Mountain biking involves different skills to road riding. One of the most important is how to ride singletrack – here’s how to master those narrow technical trails…
Riding off-road arguably involves developing more technical skills that road cycling. Both disciplines require a good level of aerobic fitness, and the ability to climb, descend and corner at speed. But knowing how to ride singletrack is key to mountain biking. All you need is some MTB-specific kit, a pair of the best cycling shoes and some of tips from a pro rider.
Leaving the black stuff behind and heading out onto technical trails will mean you’re faced with a number of challenges. The terrain can change from grass or dirt to mud, gravel, stones, rocks or roots in an instant.
Hills tend to be steeper off-road too, so you’ll need to put the power down in lower gears and higher cadences. On descents that’ll mean braking into turns more than you would on the road. You also need to shift your body weight around more to allow for greater control on uneven surfaces.
On top of that you’ll likely encounter obstacles on the trail. Those can range from off-camber roots and rocks to drain bars and drop-offs. Often riding off-road means pedalling on wide non-technical paths, byways or fire-roads. But when the trail starts to narrow, twist and turn, what’s the best way to ride this technical terrain?

How to ride singletrack
There are a number of factors to consider when riding technical trails on a mountain bike, gravel bike or cyclocross bike. Learning how to ride singletrack will test and develop all your bike handling skills. Canadian pro mountain biker Andrew L’Esperance tells us how it’s done.
Trail difficulty
In the UK, mountain bike trails in trail centres are usually rated as follows: green for easy, blue for moderate, red for difficult and black for severe.
Andrew says: ‘In Canada and the US they’re rated as follows: white circle, green circle, blue square, black diamond and double black diamond. Trail ratings can vary in different areas and trail systems, so figure out at what level the singletrack starts at your local trail system. Start on the easier trails and progress through the levels as your skills and comfort on trails increase.’
Positioning
You need to stay agile on a mountain bike, as trails are rarely flat and straight. Be ready to shift you body position as the terrain changes.
Andrew says: ‘When pedalling seated along low-grade singletrack, your body position should simply be your normal bike riding position. When approaching a corner, an obstacle or a descent, you should get into the “ready” position. That is, ready to move with the bike and allow the bike to move underneath you. The “ready” position is standing, level pedals, slight bend to arms and legs, weight distributed evenly between the front and back of the bike and eyes looking forward and down the trail.’
Cornering
When riding at speed through singletrack it’s easier to weave through shallow turns using your bodyweight rather than turning the bars. Make sure you pull up your inside pedal to avoid striking the ground at the apex. It’s best not to sit planted on the saddle either; instead hover above it, allowing you to shift your centre of gravity left and right to negotiate the turns. Of course, you’ll need to turn the bars on tight, technical turns. But make these turns as smooth as possible and use your bodyweight to lean into them too.
Andrew says: ‘There are many different types of corners that you will encounter out on singletrack. There are flat corners, bermed corners, tight corners, wide corners, switchback corners, downhill corners, uphill corners – the list goes on. Each type of corner will require a slight variation on the following technique. When approaching a corner, use your braking skills to adjust your speed coming into the corner. Aim to do most of your braking before the mid- point of the corner. Get into the “ready” position with weight distributed evenly between the front and back tires. With your head up, eyes forward, look through the corner and use a combination of steering and leaning the bike to move through the corner. Leaning the bike allows you to connect the side knobs of the tires with the ground – that’s what they’re designed for. Imagine yourself pushing the tires into the ground evenly through your arms and legs.’
Shifting / cadence
Whereas older mountain bikes have three gears up front as well as a block of eight or nine at the back, more modern bikes tend to have one or two gears at the front and a larger cassette of 10 or 11 gears at the back. Ideally if you have more than one front gear, try not to change that too often, as it produces a fairly big change in your gearing. Instead, use the rear gears where possible for gradual changes in gear ratio.
Andrew says: ‘Use your shifters to adjust the gears so you’re pedalling at a cadence that feels right to you. 80-90 revolutions per minute (RPM) is a good place to start. When approaching a climb, shift into an easier gear to prepare for the decrease in speed. When cresting a climb into a descent, shift into a harder gear as you increase your speed. With the correct head position, looking forward and down the trail, you can process what’s coming and shift your gears accordingly as you flow through the trails. Smooth shifts and optimal cadence will allow you to maintain momentum on the trails.’

Braking
The temptation when trying to scrub off speed is to grab at your brakes. Instead, it’s better to ‘feather’ them – keeping one or two fingers over the brake levers an applying pressure gradually and evenly when you need to. This way you’ll find you use your brakes more for control than slowing or stopping. Counter-intuitively, using your brakes little and often is more likely to help you go faster overall.
Andrew says: ‘Ensure the brake levers are adjusted such that you can have a single finger on the brakes and comfortably hold onto the grips at the same time. When riding singletrack, use the front and back brakes together. Learn to modulate, or control, the brakes while slowing down. This will keep the tires rolling with the terrain and not losing traction while braking.
‘On singletrack, you will ride on a variety of surfaces ranging from hard-pack dirt to small, loose rocks and everything in between. You can use your brake control skills to slow down effectively on these different surfaces. To improve brake control, practice slowing down from a high speed on a variety of surfaces. Practice with just the front brake, just the back brake, and both brakes together. Aim to slow down as quickly as possible without skidding the tires.’
Climbing
There are two main elements to climbing well off-road – gearing and body position. Shift down into a climb so can keep a steady cadence. Move your body forward so you’re perched on the nose of the saddle and your centre of gravity is over your bars. If the climb is particularly steep or technical you may need to get out of the saddle. Again, nudge your centre of gravity over the front wheel and use your arms to lever the bars as you climb.
Be careful of slippery terrain though – if you’re out of the saddle, your rear wheel is more likely to slip and lose traction. So shift your body position back (or rest on the saddle) if you need to.
Andrew says: ‘When approaching a climb, shift into an easier gear to prepare for the change in grade and speed. Continue pedalling as you climb to maintain momentum. Shift your body down and forward on the bike to maintain an even weight distribution between the front and rear of the bike. If it is a long climb, settle into a pace that you feel you can maintain for the entire length of the climb. If it is a short climb, you can use momentum and a burst of power though the pedals to get over it smoothly and quickly.’
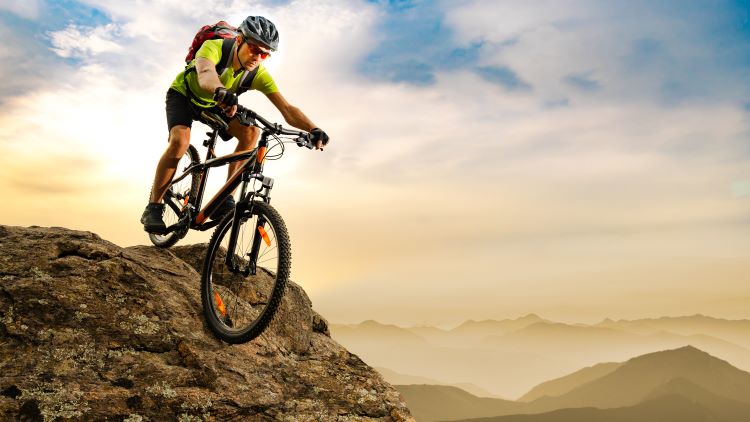
Descending
There are three things to bear in mind as you descend on singletrack – eyeline, braking and body position. Remember to look ahead on the trail and through any turns – don’t look at what’s right in front of your front wheel. Feather the brakes to increase grip and control. And shift your bodyweight to the back of the saddle. If the descent is particularly steep, you may want to drop off the back of the saddle altogether and get your backside over your rear wheel.
Some bikes come equipped with dropper posts, allowing you to lower your saddle’s height on the fly to give you a lower centre of gravity when descending. This also makes it easier to drop off the back of the saddle without your shorts getting caught on it!
Andrew says: ‘You guessed, it, get into the “ready” position. Use your brake control skills to maintain a comfortable speed down the descent, aiming not to lose traction and keep the tires rolling. Shift your weight forward and backwards within the “ready” position with the changes in grade of the descent.’
Obstacles
Obstacles on the trail can be daunting at first, but with practice you’ll be able to ride over many of them. Rocks or small craters can often be soaked up by your arms, your bike’s suspension (if it has any) or tyre volume. Fallen branches and other obstacles perpendicular to the trail are best attacked with confidence. So use this technique with small branches or tree roots until your confidence grows.
Approaching a root or branch, assess your speed, taking a little off if necessary. If it’s small enough to roll over, let your suspension and your arms soak up the impact and raise yourself off your saddle as you roll over it. If the obstacle will need a bit more clearance, keep your pedals level and push the bars up and away from you, which will ‘pop’ the front wheel up over the obstacle.
As you grow in trail confidence, you’ll be able to pop the whole bike up off the ground this way (if you’re clipped into your pedals you can lift your legs to assist you).
Andrew says: ‘As your skills progress and you venture onto increasing more challenging trails, you will encounter features on the trails. A feature could be a jump, a drop, a technical rock garden, a sketchy corner, a rock roll and any and all combinations of these. A good place to start is to develop the skills to tackle these different features on their own.
‘Find a local MTB skills park or a trail that has features that progress in size and difficulty. Start small and focus on good technique, then progress in size and difficulty. Hire a skills coach or go riding with a friend that knows what they’re doing. Once you fill your toolbox with these skills, you will be able to transfer them to the trail.’
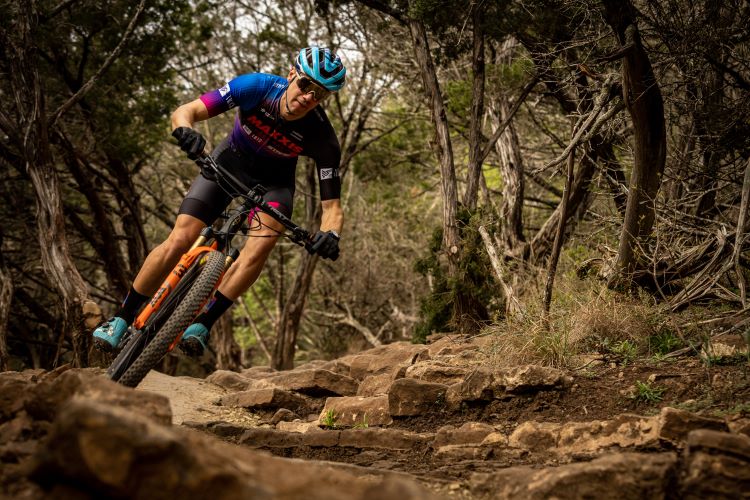
Andrew L’Esperance is the 2023 Canadian MTB Marathon National Champion and two-time BC Bike Race Champion (2021 and 2023). He rides for the Maxxis Factory Racing team and is a 4iiii athlete.
Related content: