From rows to squats, we’ve rounded up our favorite dumbbell exercises for every muscle group.
Simple, beginner-friendly and supremely effective, a set of dumbbells is an ideal way to begin your strength training journey. Small enough to tuck under a bed or sofa, the best adjustable dumbbells and fixed dumbbells are easy to use and some of the best kit for versatility, with a huge range of exercises and workouts for every body part.
Dumbbells are highly effective tools for building muscle and strength due to their versatility, practicality, and ability to engage stabilizing muscles. One of the key advantages of dumbbells is that they allow for a wide range of movement patterns and exercises, making them ideal for targeting multiple muscle groups in the body. Unlike machines that often restrict movement, dumbbells promote natural and functional movements that mimic real-life activities, leading to more comprehensive muscle activation. This variety of exercises helps create muscle confusion, preventing plateaus and promoting muscle growth across different planes of motion.
Additionally, dumbbells offer the advantage of unilateral training, where each side of the body works independently. This helps correct muscle imbalances between the left and right sides, leading to symmetrical muscle development and reducing the risk of overcompensation by stronger muscle groups. By engaging each side separately, dumbbells promote balanced muscle recruitment, enhancing overall muscle strength and coordination.
The free weights provided by dumbbells require greater stabilization and core engagement compared to machines, leading to improved functional strength and stability. This stabilization aspect is crucial for developing core strength as well as strengthening stabilizer muscles surrounding the joints. By engaging these smaller supporting muscles, dumbbells promote better joint health, reduce the risk of injury, and enhance overall strength and stability in functional movements.
And the adjustability of dumbbells allows for incremental load increases, making them suitable for progressive overload – the key principle for muscle and strength development. By gradually increasing weights and challenging the muscles with heavier loads, you can stimulate muscle growth and strength gains over time. That adaptability makes dumbbells a versatile tool for men of all fitness levels, from beginners to advanced lifters, seeking to build muscle and strength effectivel
Below, the Men’s Fitness experts have rounded up the best dumbbell exercises to add to your workouts to build strength and muscle. We’ve split the exercises into different categories, based on the muscle group targeted.
Why you can trust our exercise advice
At Men’s Fitness we pride ourselves on delivering information that serves a singular purpose: to improve some aspect of your health, fitness or wellbeing. For over 16 years, we’ve been publishing authoritative health and fitness content – written by our expert editors and contributors. Each of our workouts has been created and tested by either a highly experienced editor or expert contributor.
The best dumbbell exercises for back
- Dumbbell bent-over row
- Dumbbell reverse-grip bent-over row
- Single-arm dumbbell row
- Single-arm dumbbell gorilla row
- Dumbbell reverse flye
- Dumbbell renegade row
- Dumbbell deadlift
Our favorite dumbbell exercises for shoulders
- Dumbbell shoulder press
- Seated dumbbell shoulder press
- Dumbbell Arnold press
- Dumbbell lateral raise
- Dumbbell front raise
- Single-arm dumbbell shoulder press
The best dumbbell exercises for chest
- Dumbbell bench press
- Incline dumbbell bench press
- Decline dumbbell bench press
- Dumbbell floor press
- Dumbbell flye
- Incline dumbbell flye
- Dumbbell pull-over
Dumbbell exercises to add to your leg workouts
- Dumbbell goblet squat
- Dumbbell squat
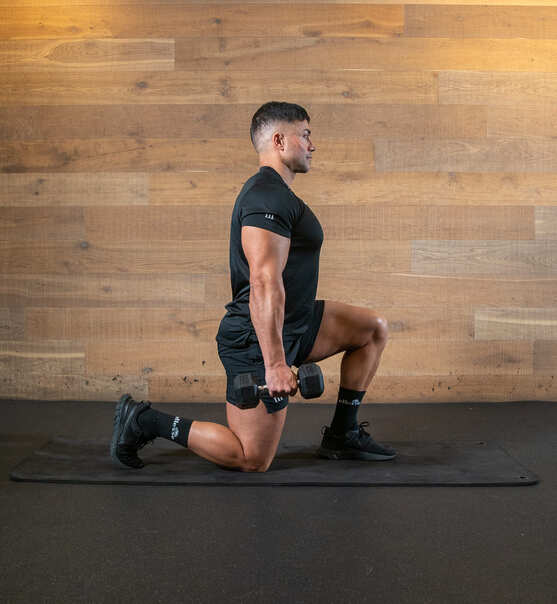
- Dumbbell lunge
- Dumbbell reverse lunge
- Dumbbell side lunge
- Dumbbell split squat
- Dumbbell Bulgarian split squat
- Dumbbell Romanian deadlift
- Dumbbell single-leg Romanian deadlift
Dumbbell exercises to build your arms
- Dumbbell biceps curl
- Alternating dumbbell biceps curl
- Dumbbell hammer curl
- Dumbbell zottman curl
- Dumbbell incline biceps curl
- Dumbbell triceps extension
- Dumbbell skullcrusher
Work your core with these dumbbell abs exercises
- Dumbbell renegade row
- Dumbbell push-up to renegade row
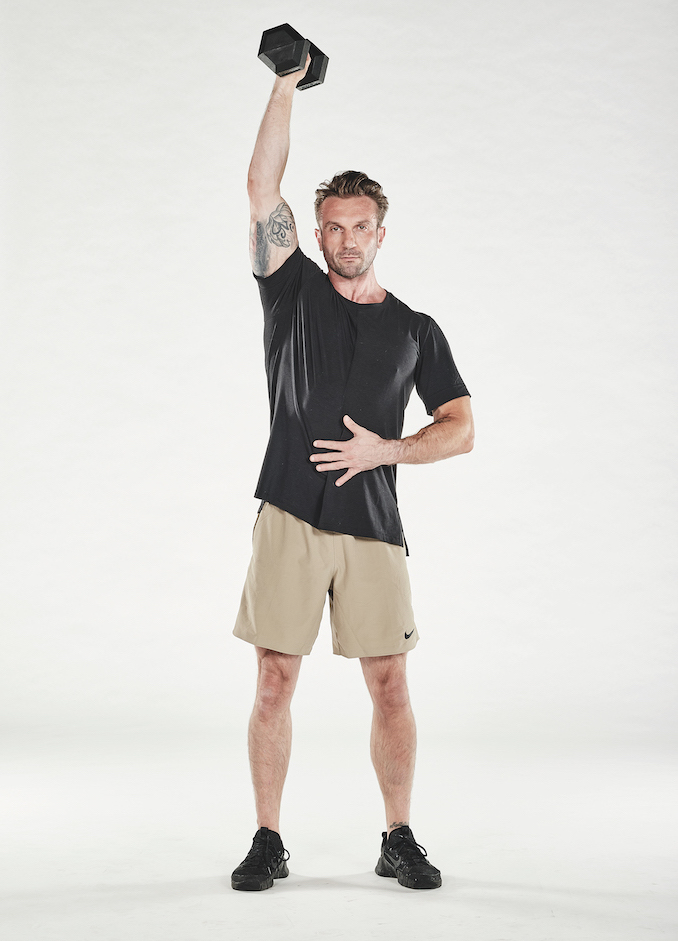
- Dumbbell halo
- Dumbbell Russian twist
- Dumbbell crunch
- Dumbbell side bend
- Dumbbell crunch reach
Here’s our pick of the best dumbbell exercises for back
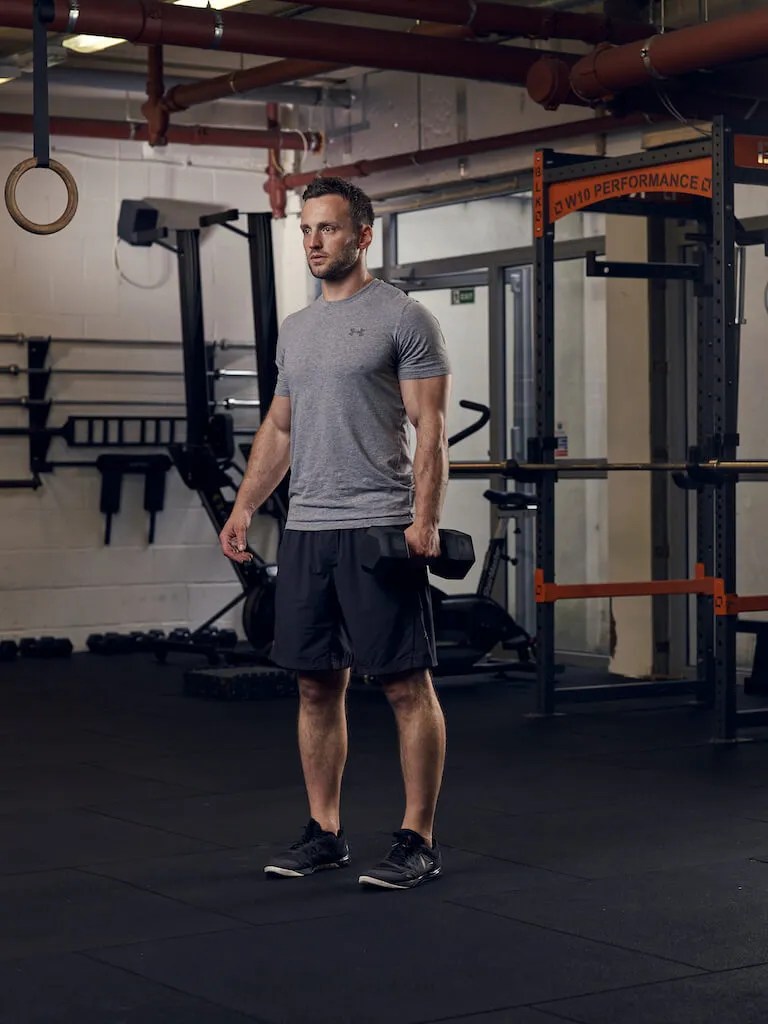
“The best dumbbell back exercises for you will be very individual,” says The Movement Blueprint founder Harvey Lawton (pictured below). “That’s because certain movements and exercises will suit one person far better than another due to their biomechanics and other structural presentations.
“But in general the best dumbbell moves for a stronger back are those that recruit the full back and kinetic chain into the movement – think larger, compound movements that rely on strength, stability and mobility at various joints and muscles. These include the hinge pattern, anteriorly (front) loaded movements e.g a Zercher or goblet, drags and carries. Additionally, movements that effectively isolate muscle groups within the back – such as the lats or rear delts – can be hit hard with the single-arm row. Subtle positional changes to the row will also help bias different muscles in the back too.
“Training with dumbbells or free weights provides higher levels of learning for the body, with greater integration of the body’s stabilising systems. On the flip side, machine-based exercises also provide high levels of external stability allowing for higher levels of output from the joints or muscles. On a machine less energy is spent trying to stabilise or react to different forces or stimuli. A big athletic back relies on both fields of play – not just one. My advice is therefore to implement a variety of movements that both integrate and isolate, and watch the muscle pack on!”
- Dumbbell bent-over row
- Dumbbell reverse-grip bent-over row
- Single-arm dumbbell row
- Single-arm dumbbell gorilla row
- Dumbbell reverse flye
- Dumbbell renegade row
- Dumbbell deadlift
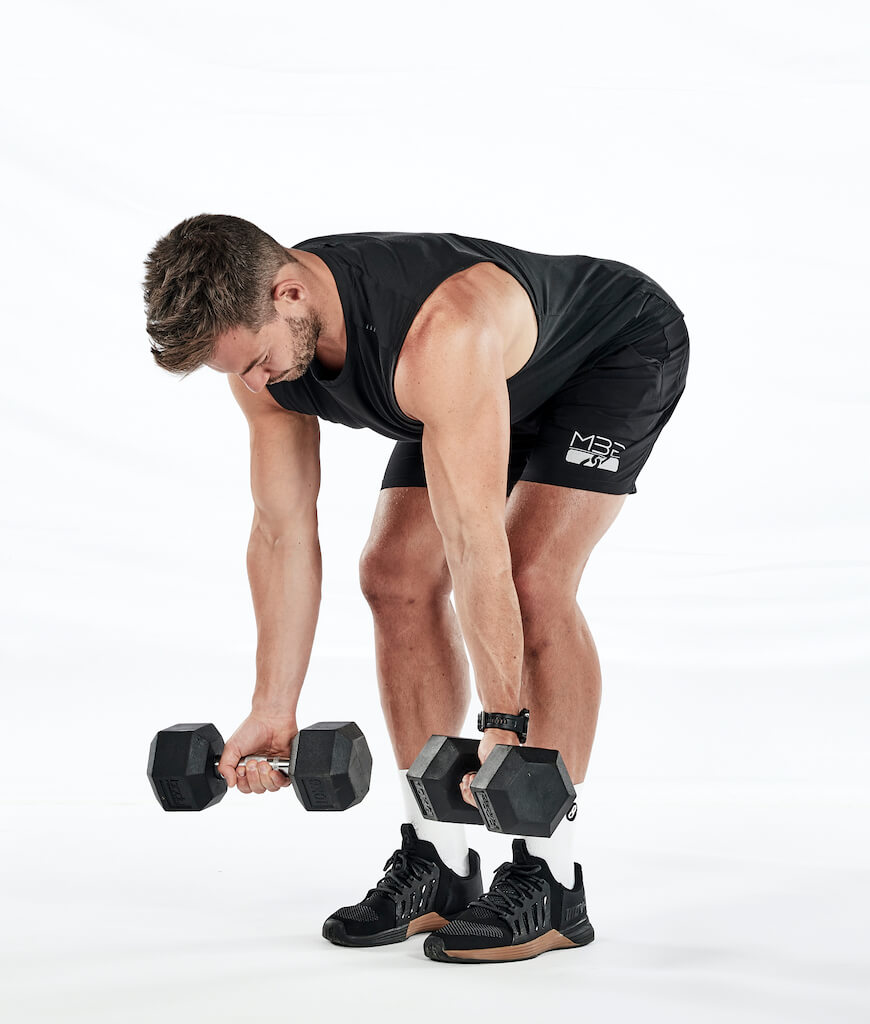
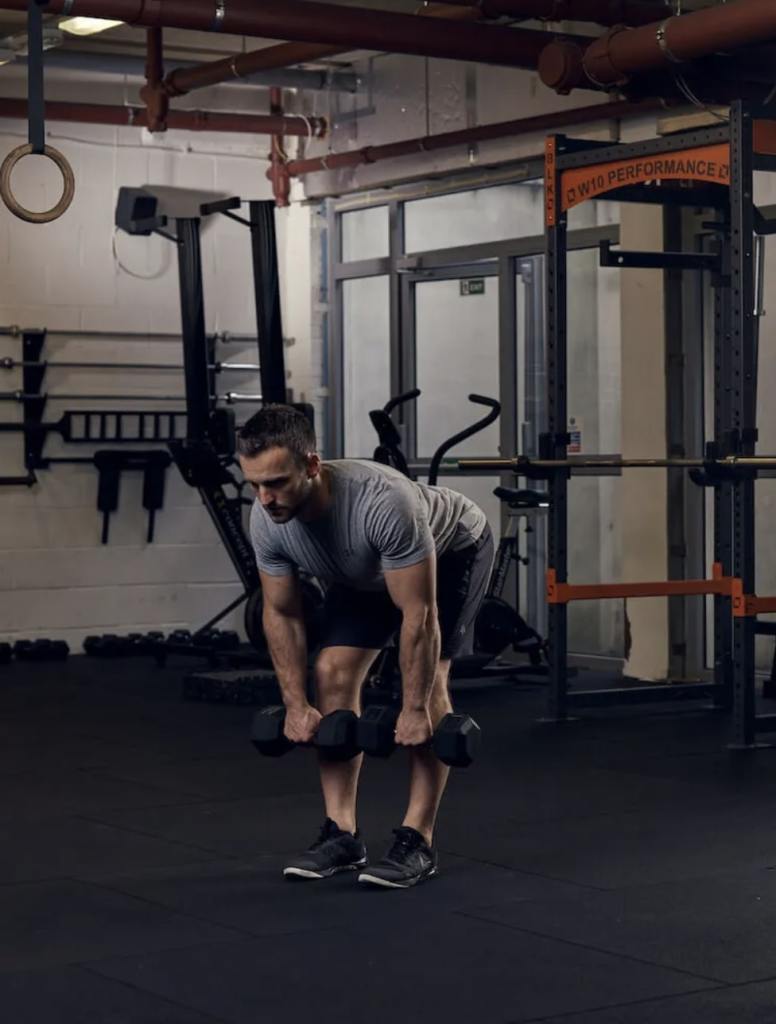
1. Dumbbell bent-over row
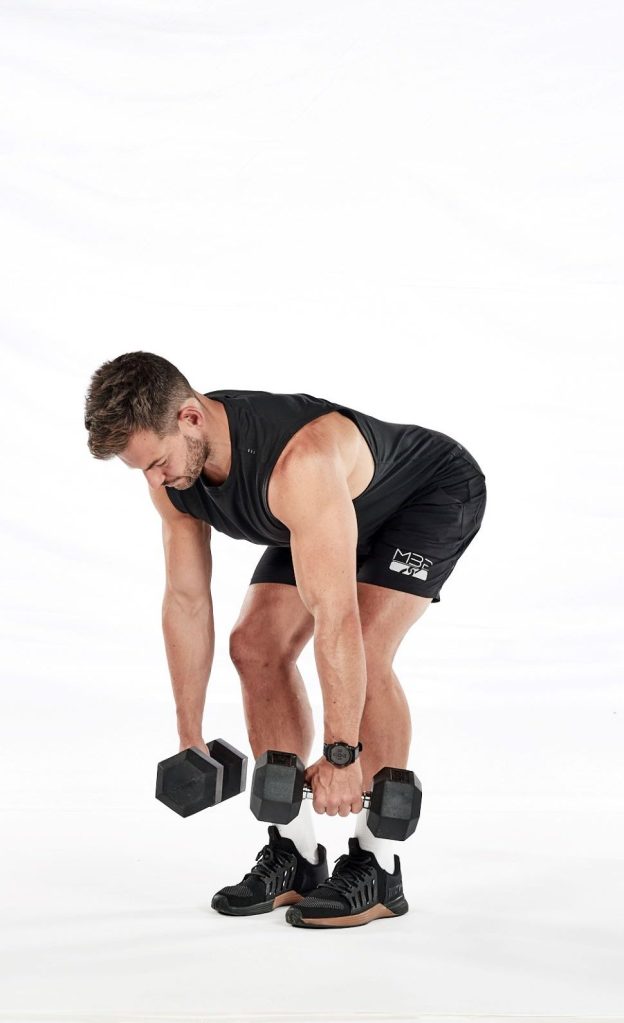
Why we like it: The dumbbell bent-over row is one of the best dumbbell exercises for targeting your entire back, while also working your core, biceps and shoulders.
How to do the dumbbell bent-over row:
- Using dumbbells involves the same target muscles as the barbell variety, while preventing the stronger side of your body doing more than its share of the work
- Start with your core braced, your back straight and your shoulder blades retracted
- Bend your knees slightly and lean forwards from the hips
- Let the weights hang at knee level
- Pull the dumbbells up to your lower sternum, retracting your shoulder blades to allow the weights to come up to your hips, then lower slowly to the start
Common problems with the dumbbell bent-over row:
- Lower back pain: This is often due to improper hip hinge or rounding of the back. Ensure your hips are hinged properly and your spine remains neutral
- Neck pain: Could be due to lifting your head too high or letting it drop too low. Keep your gaze about a foot in front of you on the ground to maintain a neutral neck position
- Lack of muscle engagement: If you’re not feeling your back muscles working, try to lessen the weight and focus on the mind-muscle connection, ensuring you’re pulling with your back rather than your arms
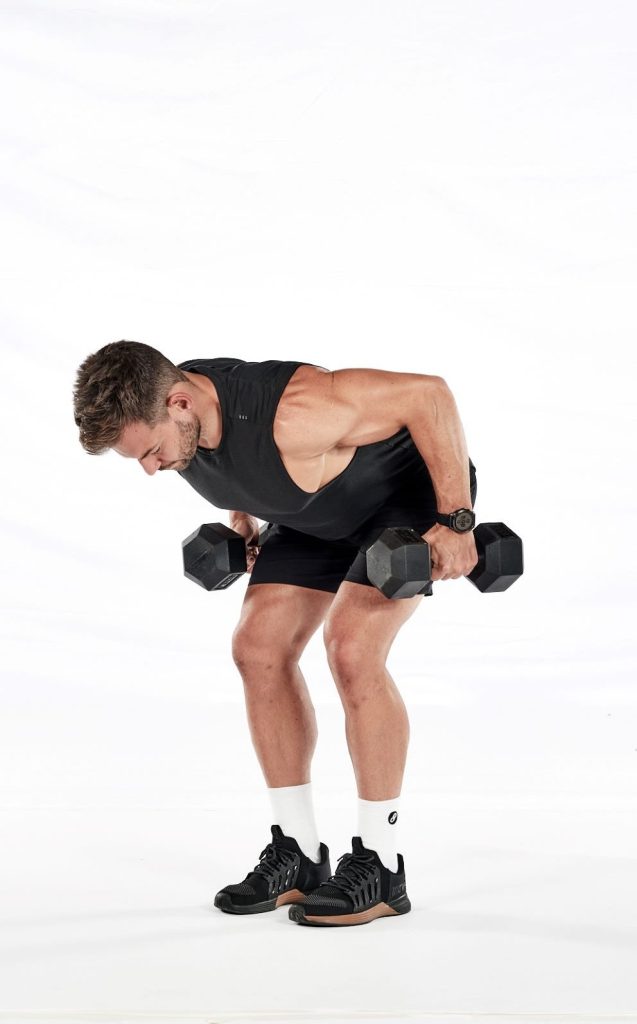
2. Dumbbell reverse-grip bent-over row
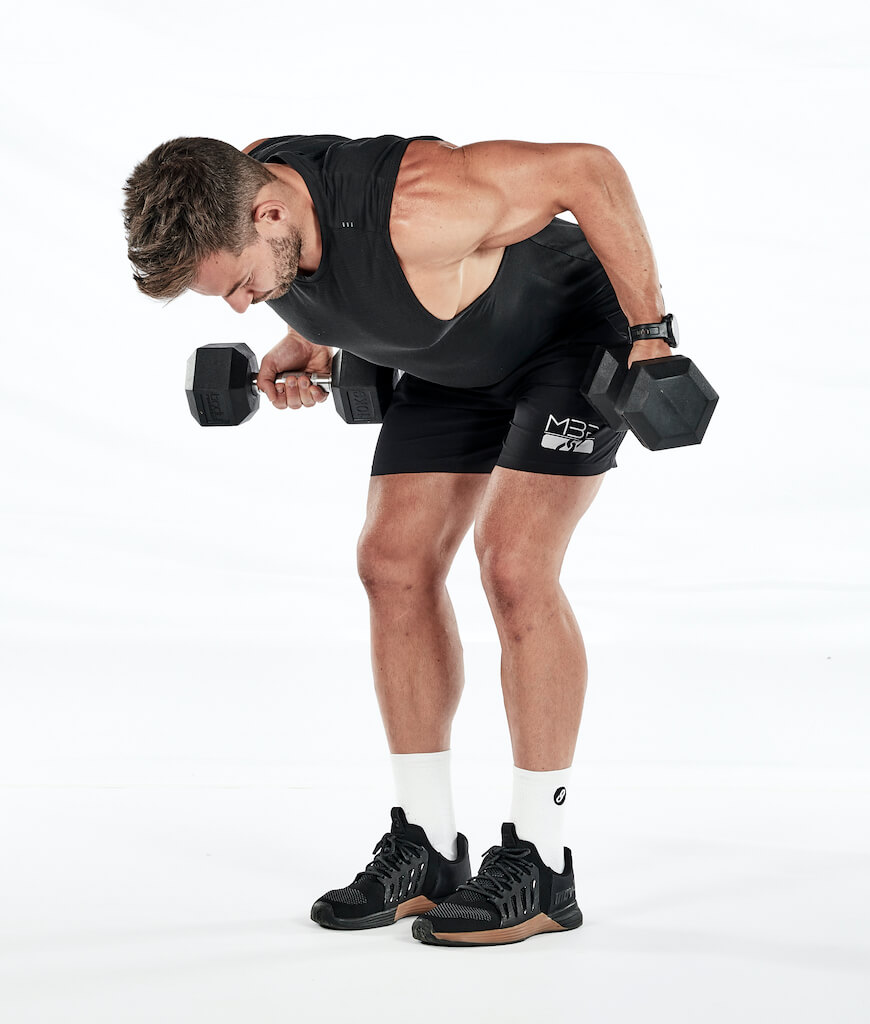
Why we like it: This variation puts extra emphasis on your lower lats, leading to a more defined V-shape in the back. It also works the biceps more.
How to do the dumbbell reverse-grip bent-over row:
- Stand with your core braced, your back straight and your shoulder blades retracted, holding a set of dumbbells with your palms facing away from you, then bend your knees slightly and lean forward from the hips
- Pull the dumbbells up to your rib cage
- Pause, then lower under control
Coaching cue: Pull the dumbbells towards your lower rib cage, leading with your elbows and keeping them close to your body. Squeeze your shoulder blades together at the top of the movement for maximum muscle engagement.
3. Single-arm dumbbell row
Why we like it: The single-arm dumbbell row allows you to go heavy while working both sides of your back and each arm individually for big muscle benefits.
How to do the single-arm dumbbell row:
- Place your right knee and right hand flat on a bench (or support your right arm on your right knee, leg slightly bent), with your left leg slightly bent and pushed out behind you
- Hold a dumbbell in your left hand with your arm hanging straight down
- With a natural arch in your back and core braced, lift the weight towards your hip, leading with the elbow
- Pause at the top before returning to the start
- Repeat on the other side
Variations of the single-arm dumbbell row:
- Bench-supported single-arm dumbbell row
– Place one knee and the same-side hand on a bench for support, with the other foot on the floor and a dumbbell in the free hand
– Row the dumbbell towards your hip, keeping your back flat and squeezing your shoulder blade at the top of the movement - Three-point single-arm dumbbell row
– Set an adjustable bench to a 30-45-degree incline
– Stand behind the bench, with a dumbbell positioned on the floor between your feet and feet positioned further back
– Rest your non-lifting hand on the top of the seat
– Hinge at the hips and, keeping a flat back, row the dumbbell up to your hips with your free hand
– Need more info? Personal trainer Luke Worthington shows you how to do the three-point row in this article
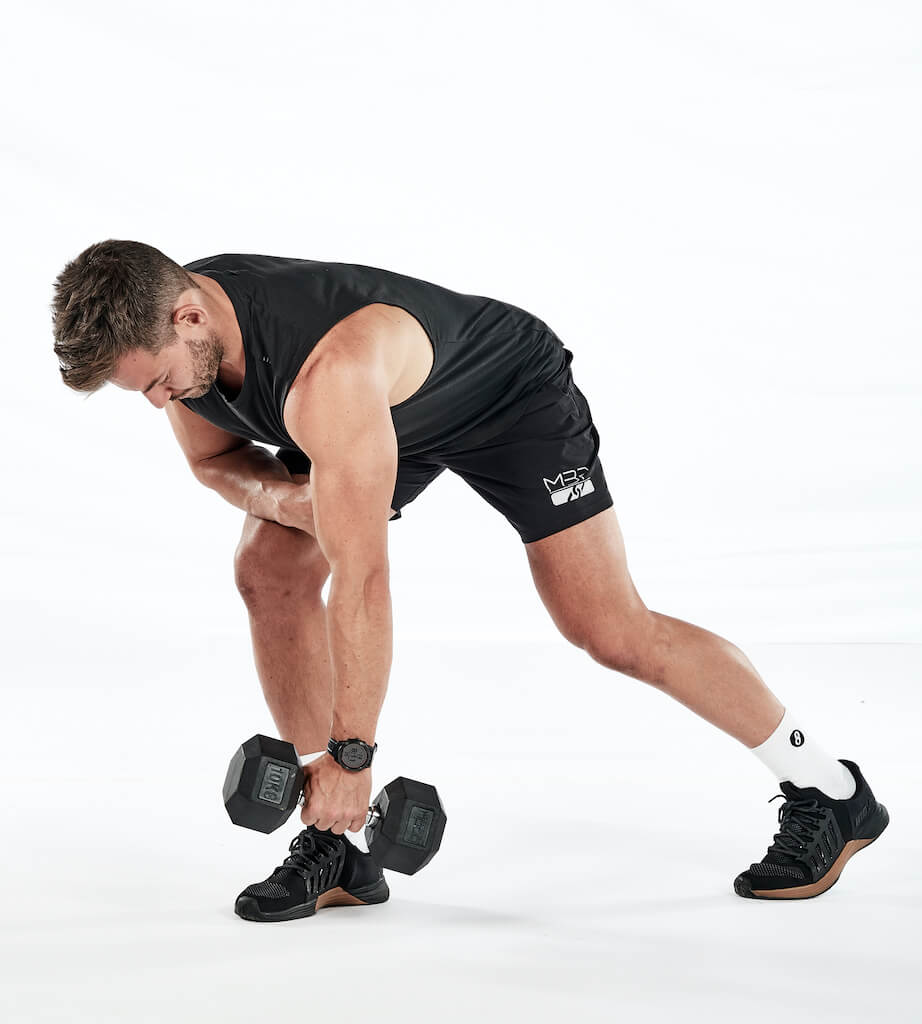
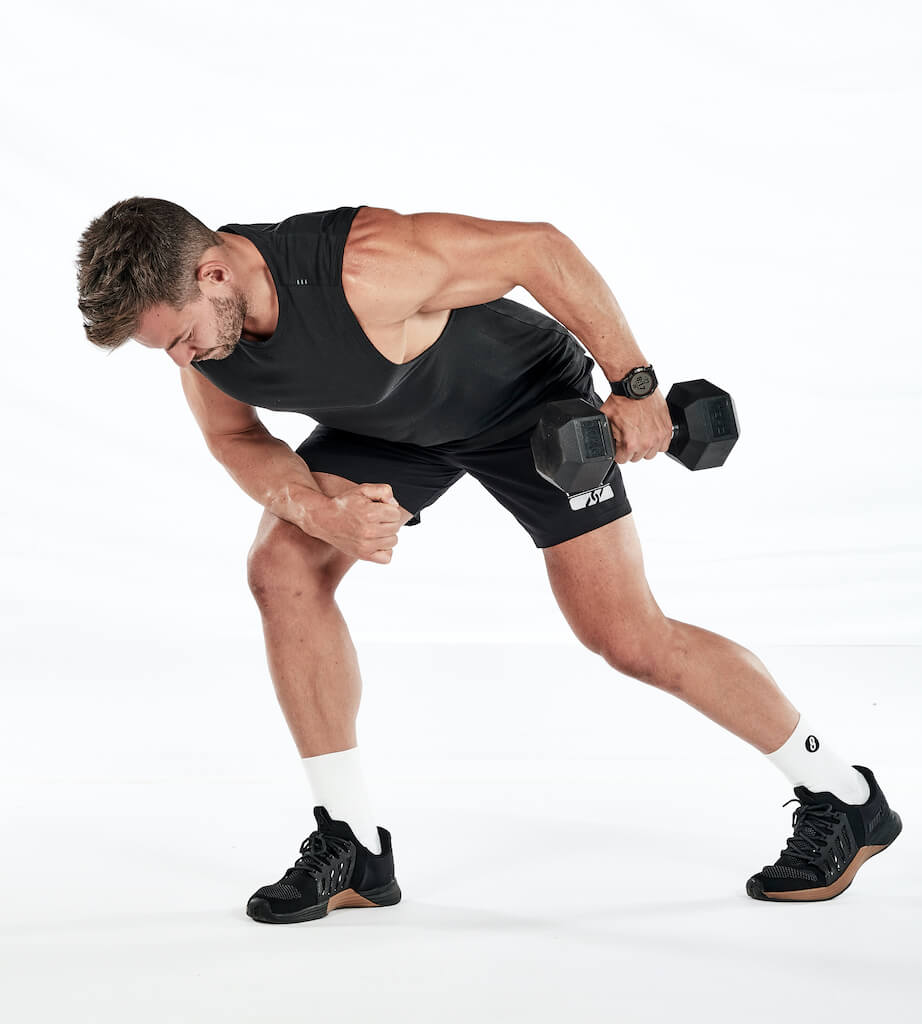
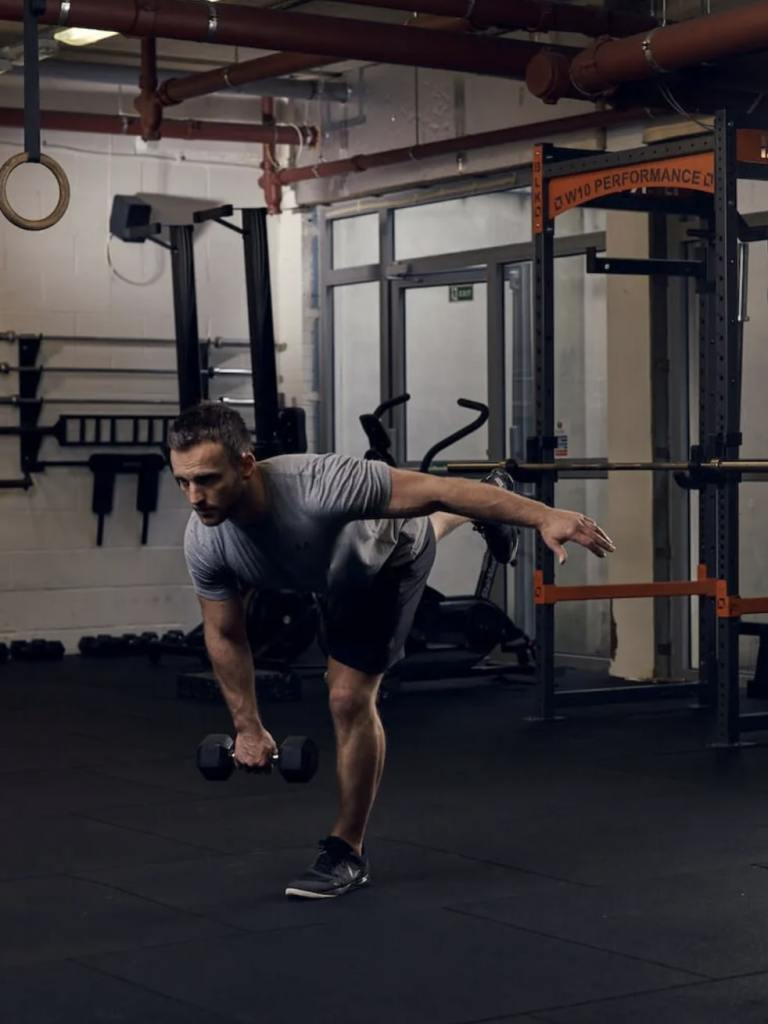
4. Single-arm dumbbell gorilla row
Why we like it: This exercise builds strength through the middle and upper back, lats and shoulders while enhancing scapular mobility, plus thoracic and abdominal stability. As well as working your upper back, lower back and biceps, this variation also works your obliques, because the more athletic stance requires more core activation.
How to do the single-arm dumbbell gorilla row:
- Place your dumbbell on the floor, standing just behind it and to one side
- Bend your knees slightly, hinge forward from your hips and reach down and grasp the dumbbell
- Brace your core and make sure your lower back is slightly arched and not rounded
- Row the weight up and back toward your hip. Lead with your elbow and keep your wrist straight. Make sure your hips and shoulders remain level and don’t twist
- Lower the weight back to the floor and repeat
- On completing your set, repeat on the other side
Common mistakes with the single-arm dumbbell gorilla row:
- Rounding the back: Maintain a flat back to avoid placing undue stress on your spine
- Using too much weight: Start with a moderate weight to ensure you can control the movement and maintain proper form
- Not engaging the core: Keep your core tight to prevent twisting and ensure proper alignment
- Letting the elbow flare out: Keep your elbow close to your body to maximize lats and upper back engagement
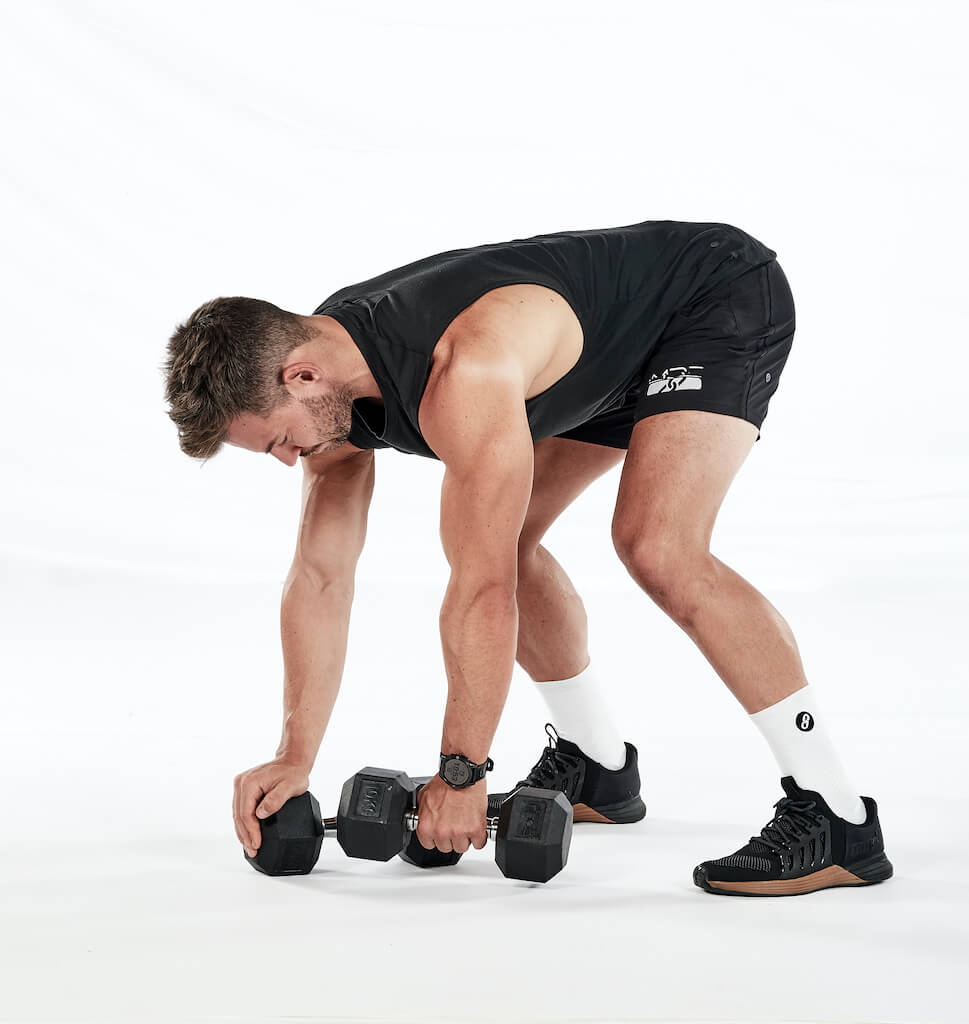
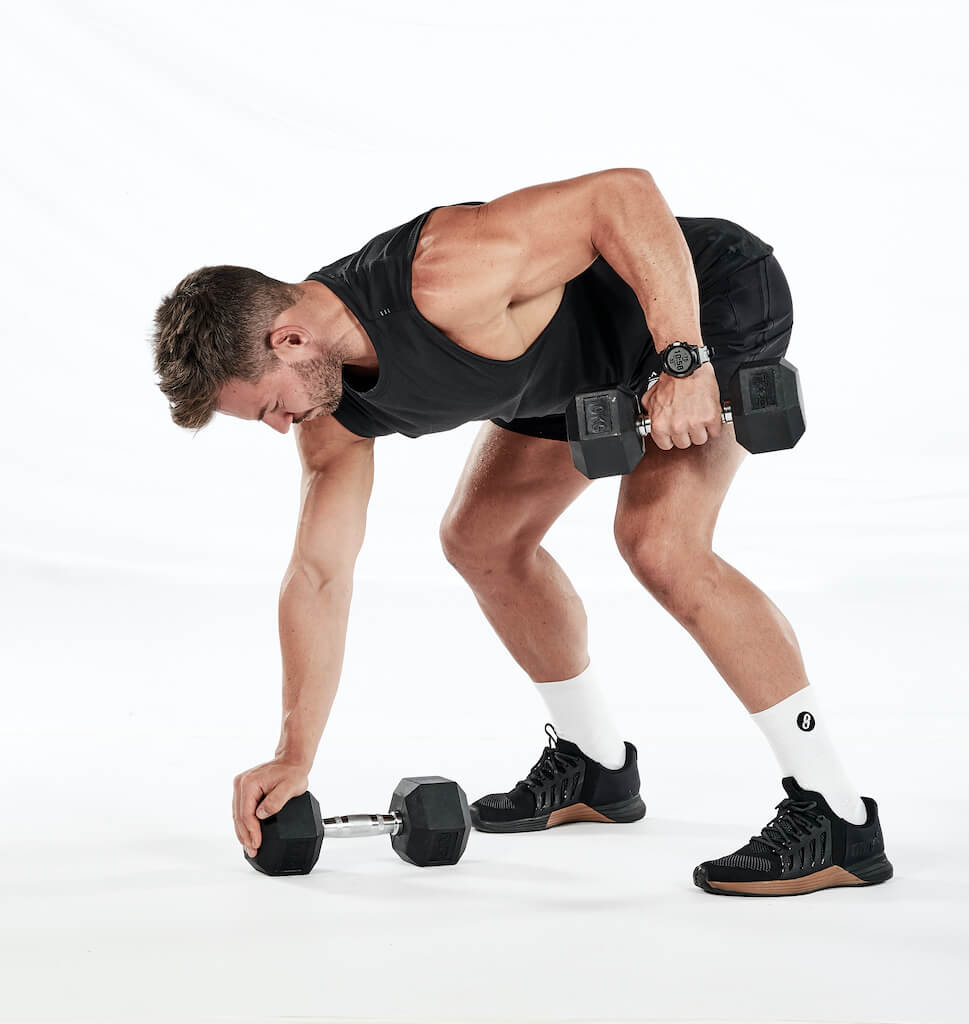
5. Dumbbell reverse flye
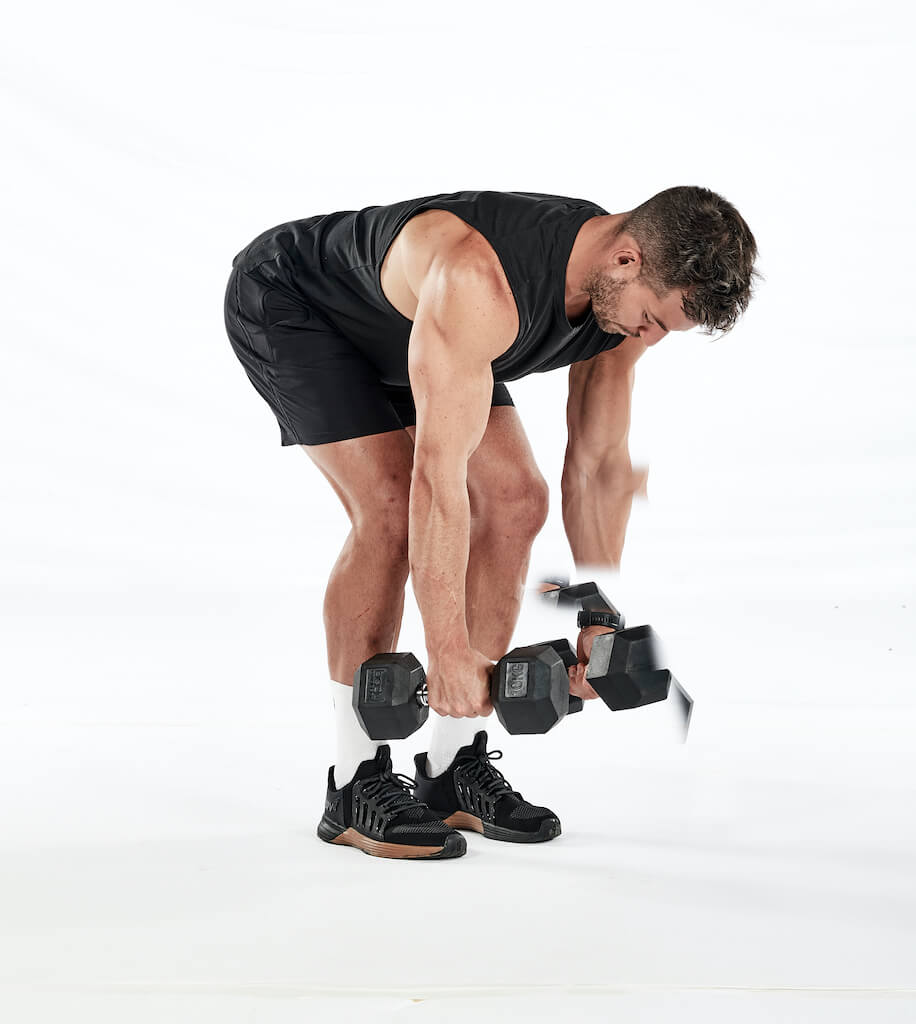
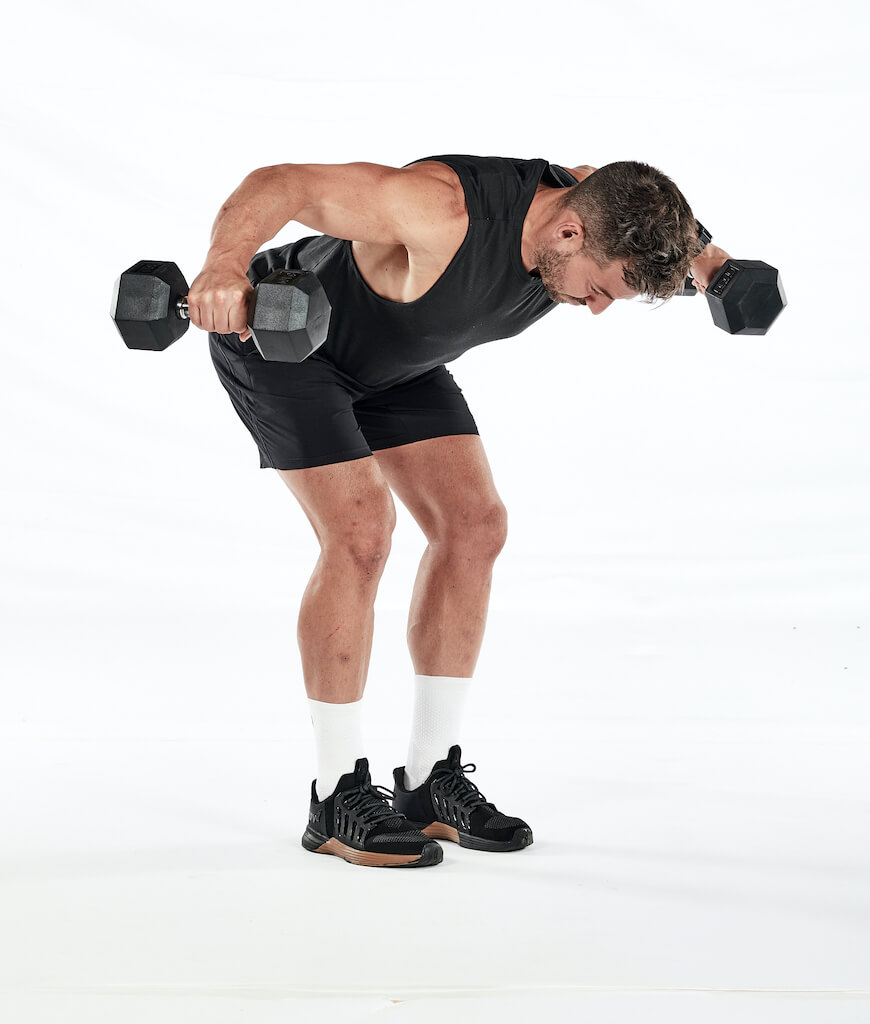
Why we like it: This is a great accessory lift for strengthening the muscles of the upper back and delts, improving posture, shoulder stability, and overall upper-body strength.
How to do the dumbbell reverse flye:
- Holding a pair of dumbbells, and with your feet shoulder-width apart, bend forward at your hips until your torso is nearly parallel to the floor
- Let the dumbbells hang straight down from your shoulders, your palms facing each other, with your arms slightly bent
- Then, keeping your back flat and your torso still, raise your arms straight out to your sides until they’re in line with your body. Don’t change the bend in your elbows
- Pause, then slowly return to the starting position
Common mistakes to avoid with the dumbbell reverse flye:
- Using momentum: Avoid using momentum to lift the weights. Keep the movement controlled to effectively target the muscles
- Rounding the back: Maintain a flat back to avoid placing undue stress on your spine
- Locking elbows: Keep a slight bend in your elbows throughout the movement
- Lifting too heavy: Choose a weight that allows you to maintain proper form throughout the set
- Neck strain: Avoid craning your neck up or down; keep it aligned with your spine
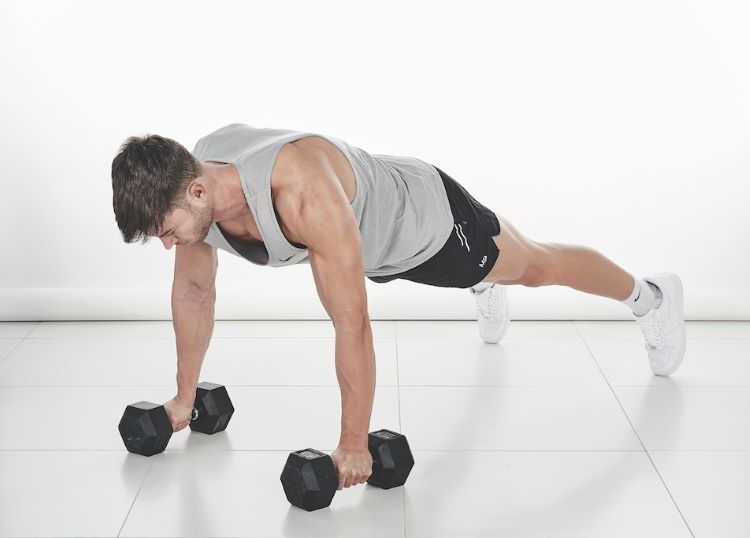
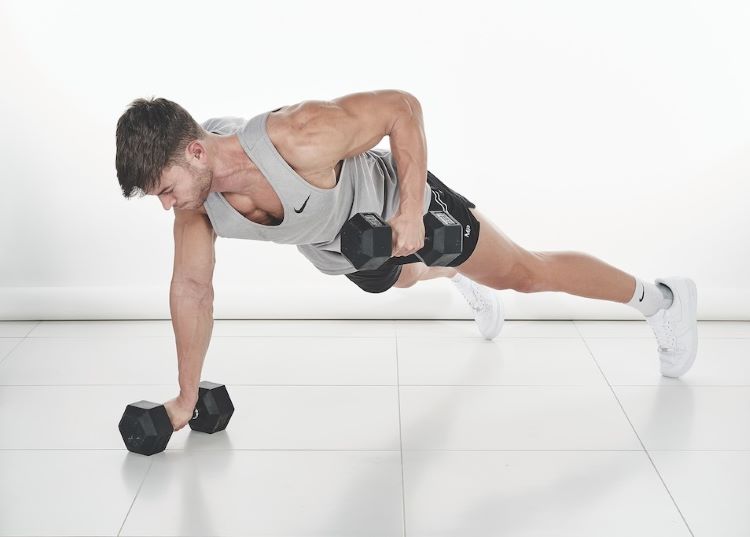
6. Dumbbell renegade row
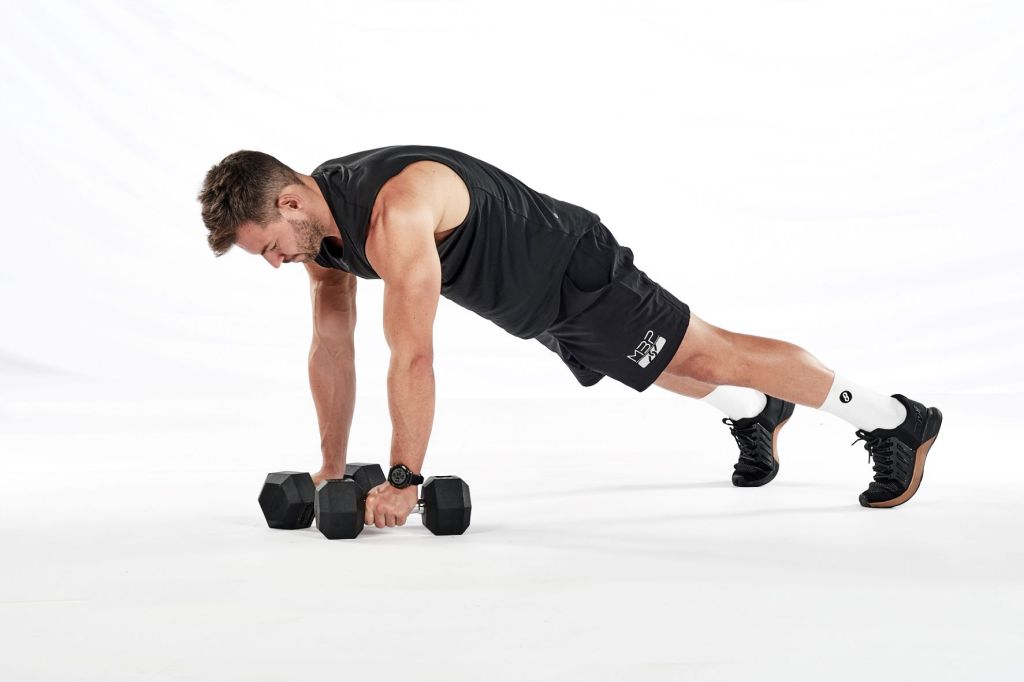
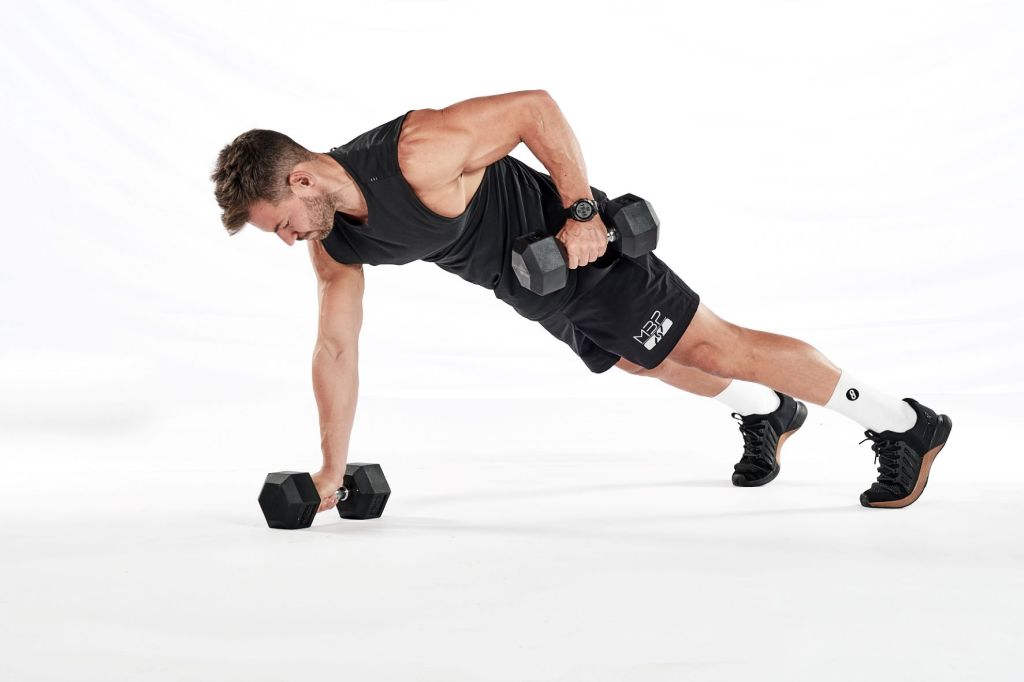
Why we like it: This is an advanced exercise that combines the benefits of a plank with a rowing movement. The renegade row targets multiple muscle groups including the upper back, core, shoulders, and arms, while also enhancing stability and coordination. It’s tough, but the best exercises often are.
How to do the dumbbell renegade row:
- Start in a press-up position with your feet shoulder-width apart and a dumbbell in each hand
- Brace your core to keep your hips static and do a single-arm row, drawing the weight towards your armpit
- Alternate sides with each rep
Coaching cue: Lift the dumbbell smoothly – as if you’re pulling it through thick mud – and imagine holding an apple between your chin and chest to keep your neck aligned.
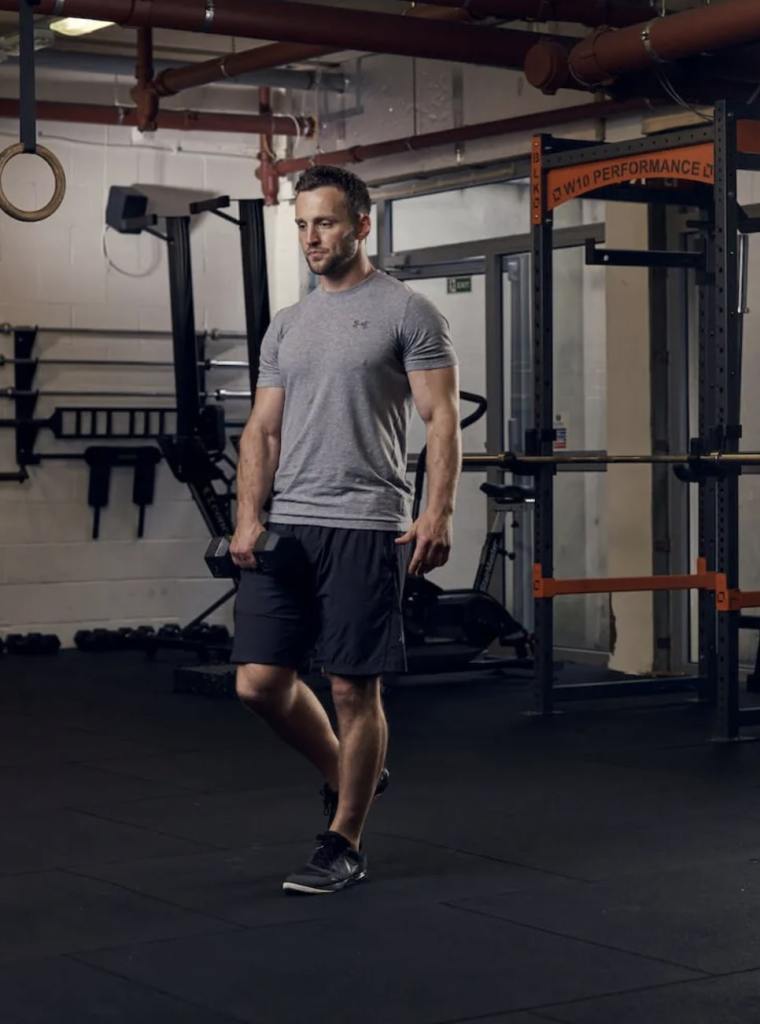
7. Dumbbell deadlift
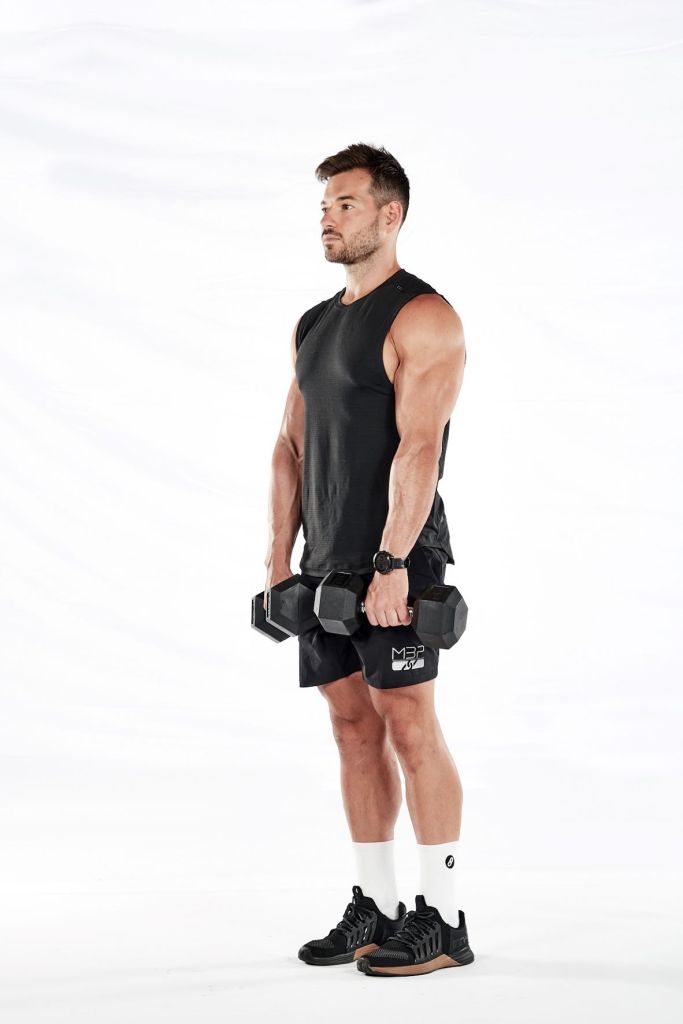

Why we like it: A foundational strength exercise that targets the posterior chain, including the glutes, hamstrings, lower back, and upper back. Compared to the barbell deadlift, dumbbells can be a gentler option for those with lower back issues, as the weights are positioned closer to the center of mass and can be kept closer to the body during the lift.
How to do the dumbbell deadlift:
- Hold a dumbbell in each hand and stand with your feet about hip-width apart
- Inhale and lightly brace your core
- Lower the dumbbells close to the floor by leaning forward and bending your knees
- Reverse the movement and return to a standing position. Exhale on the way up
Common mistakes to avoid with the dumbbell deadlift:
- Rounding the back: Maintain a flat back throughout the movement to avoid placing undue stress on your spine
- Using too much weight: Start with a manageable weight to ensure you can maintain proper form
- Incorrect hip hinge: Focus on hinging at the hips rather than bending at the waist
- Knee position: Don’t let your knees collapse inward. Keep them aligned with your toes
- Overextending the lower back: Avoid hyperextending your lower back at the top of the lift. Fully extend your hips but maintain a neutral spine
These are our favorite dumbbell exercises for shoulder workouts
The benefits of using dumbbells for your shoulder workouts are numerous. One key advantage is the ability to improve muscle symmetry and balance through unilateral training. By working each shoulder independently, you can correct imbalances and ensure uniform strength development on both sides. Dumbbells also offer a greater range of motion compared to other equipment, allowing for a deeper stretch and more complete muscle activation. This enhanced muscle engagement not only targets the shoulders effectively but also works stabilizer muscles, improving overall muscle balance and joint stability.
Another standout benefit of using dumbbells for shoulder workouts is the activation of core muscles and an emphasis on stability. Many dumbbell shoulder exercises require strong core stabilization, promoting better balance, posture, and functional strength. Dumbbell movements mimic natural patterns, reducing stress on the joints and decreasing the risk of injury. This joint-friendly design allows for a more natural plane of movement, preventing shoulder impingement and supporting long-term shoulder health. Furthermore, the versatility of dumbbells offers a wide range of exercise variations to target different areas of the shoulders, traps, and rotator cuff muscles effectively.
Dumbbells also facilitate improved muscle recruitment and a strong mind-muscle connection, leading to more effective shoulder workouts. By focusing on quality repetitions and maximizing muscle engagement, you can see significant progress in strength and muscle development. The convenience and accessibility of dumbbells make them a practical choice for shoulder training, whether you’re at home or in the gym. With space-efficient equipment that allows for easy adjustments in weight, you can effectively target all aspects of your shoulder muscles with precision and efficiency. Incorporating dumbbells into your shoulder routine can lead to better muscle balance, increased strength gains, and overall shoulder health for a well-rounded upper body workout.
- Dumbbell shoulder press
- Seated dumbbell shoulder press
- Dumbbell Arnold press
- Dumbbell lateral raise
- Dumbbell front raise
- Single-arm dumbbell shoulder press
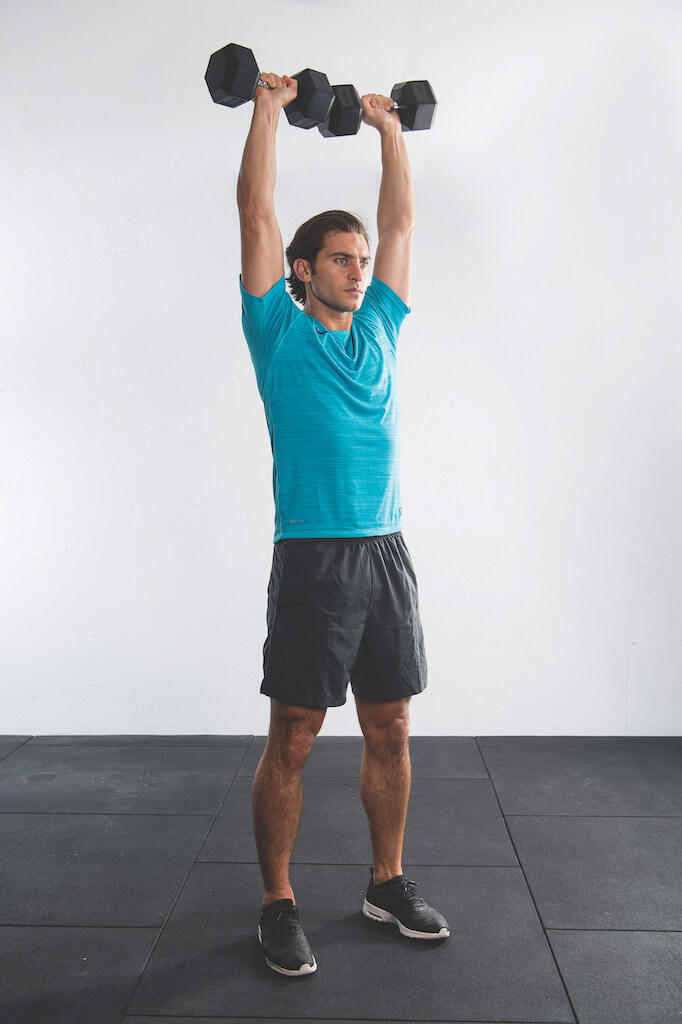
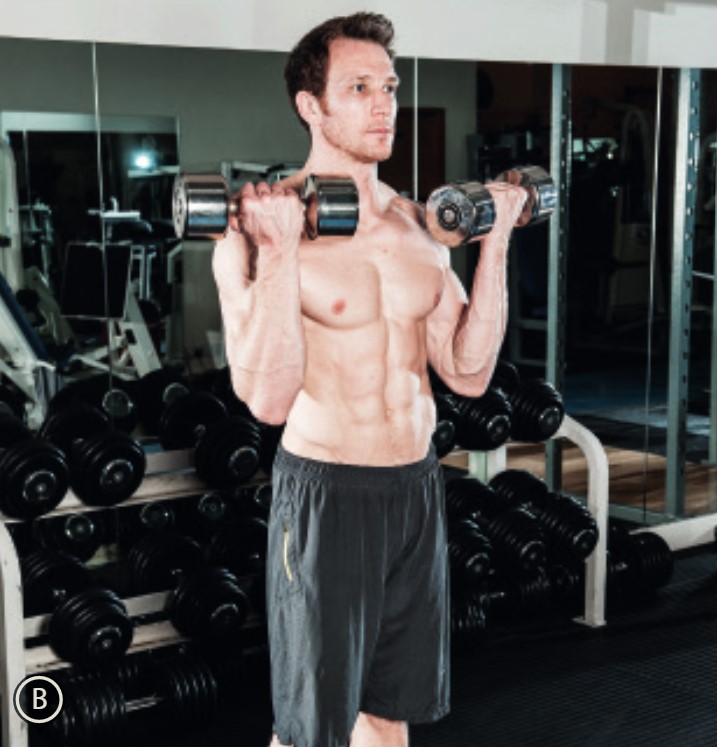
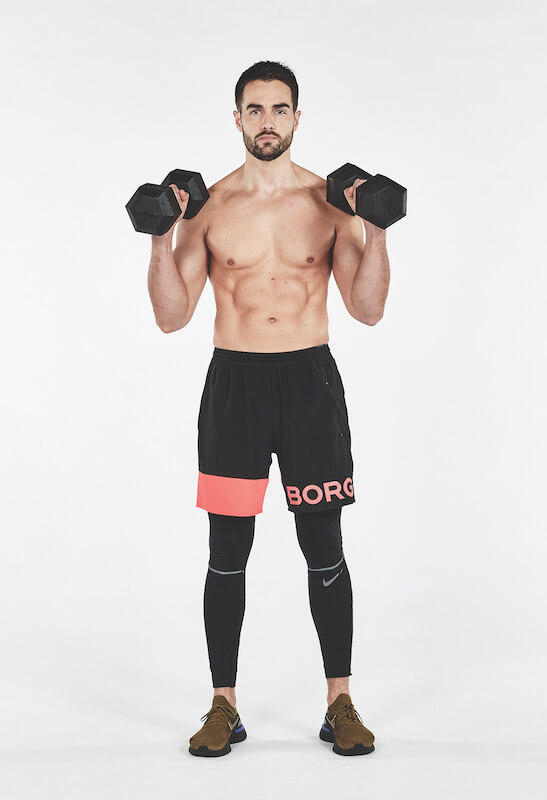
1. Dumbbell shoulder press
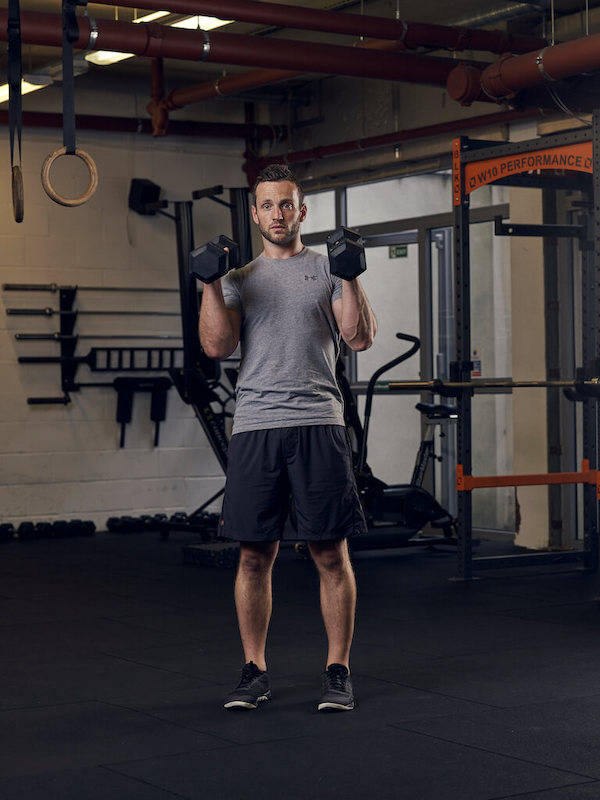
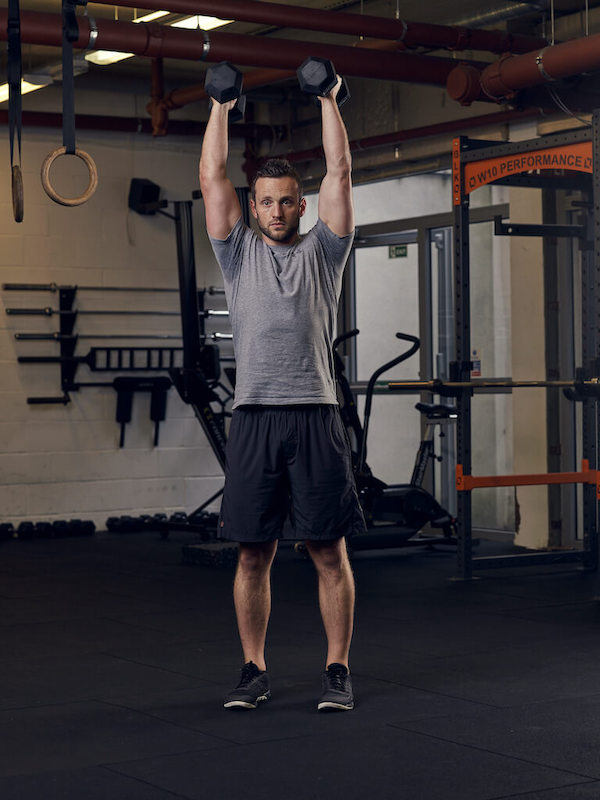
Why we like it: This classic shoulder-builder is slightly easier on your rotator cuffs (the small stabilising muscles around the shoulders) with a set of dumbbells, because your hands can rotate naturally. The ‘military’ version of this – done with your feet together, as if you were on parade – is even tougher on your core.
How to do the dumbbell shoulder press:
- With your feet shoulder-width apart, hold a dumbbell in each hand at shoulder height
- Keep your chest upright and your core muscles braced
- Press the weights directly upwards, keeping your core braced, until your arms are extended overhead
- Lower and repeat
Benefits of the standing shoulder press over sitting:
- Core activation and balance: Standing shoulder presses engage the core and challenge balance more than the seated variety, enhancing core stability and functional strength
- Full-body engagement: The standing position recruits the stabilizer muscles throughout the body, leading to increased muscle activation and a comprehensive full-body workout
- Functional movement patterns: Standing presses mimic natural movement patterns, improving coordination, mobility, and strength transfer from the lower body to the upper body, supporting overall strength gains and functional fitness
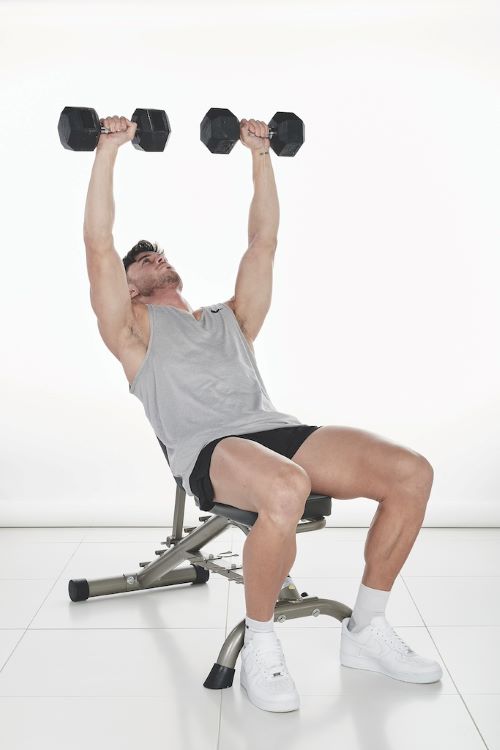
2. Seated dumbbell shoulder press
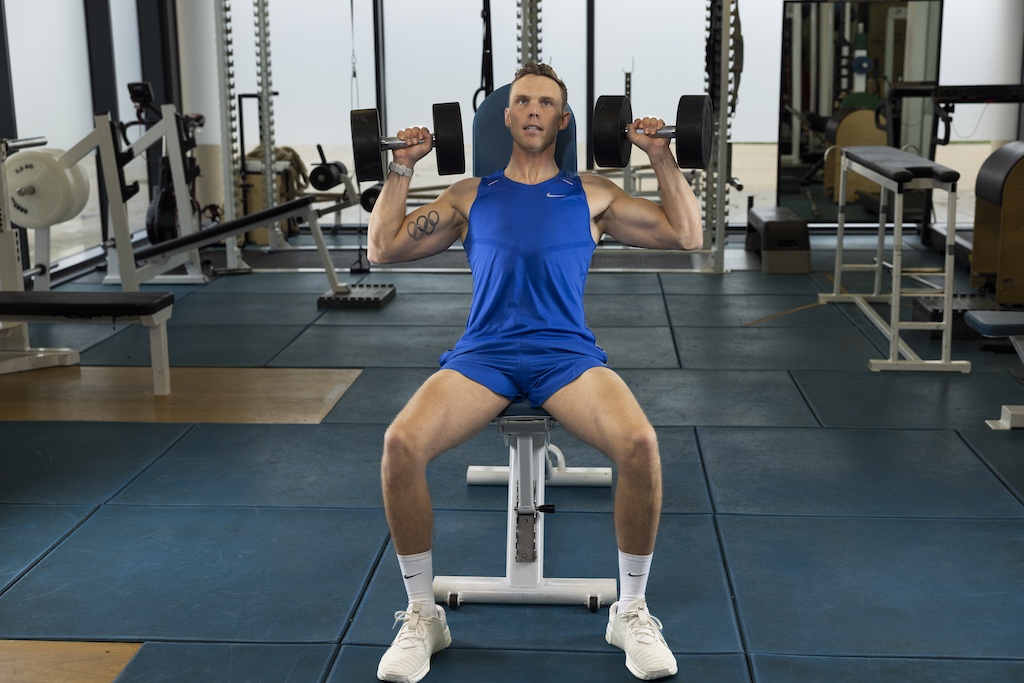
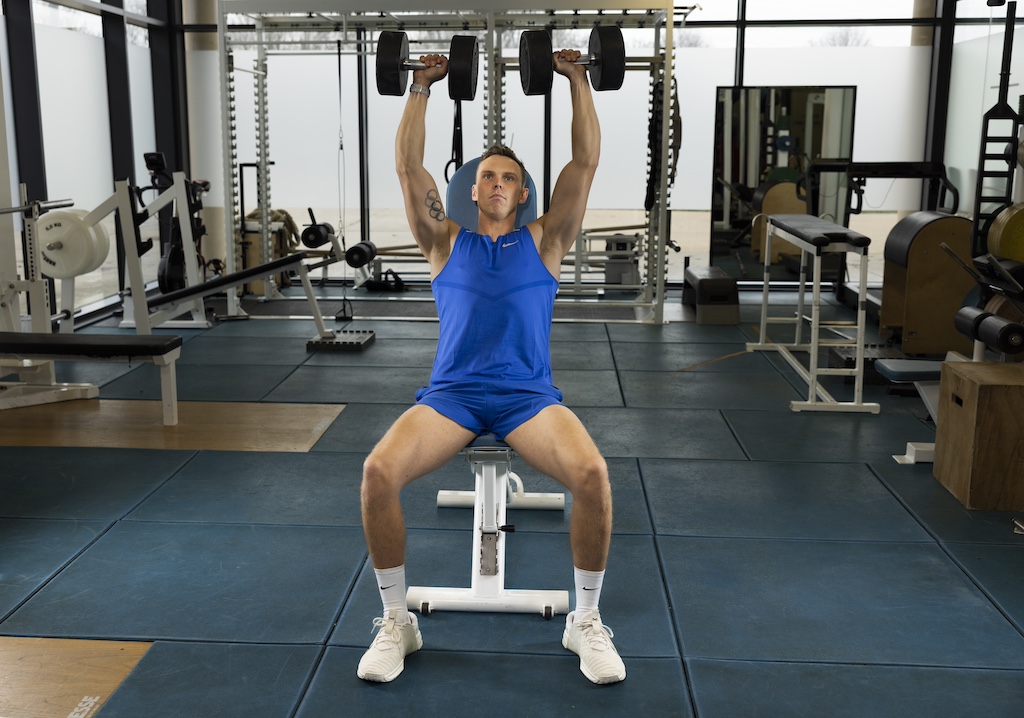
Why we like it: The seated version of the overhead press (demonstrated above by Olympian Joe Clarke), takes your legs completely out of the equation, forcing you to keep the form strict and slightly reducing the focus on your core so your shoulders get more of a hit.
How to do the seated dumbbell shoulder press:
- Sit with your back against the upright part of a bench, holding a pair of dumbbells at your shoulders
- Press them slowly overhead, allowing your arms to rotate naturally
- Pause at the top, then lower under control
Form tips for the dumbbell shoulder press:
- Maintain an even weight distribution between both feet and keep your body stable on the bench
- Avoid leaning back or using momentum to lift the weights; prioritize proper form and muscle engagement
- Start light – don’t let your ego dictate the weight
3. Dumbbell Arnold press
Why we like it: This variation of the overhead press – popularised by the Governator himself – hits all three heads of the deltoids, adding thickness and width to your shoulders. It’ll also stabilise your shoulder joints for use in bigger lifts.
How to do the dumbbell Arnold press:
- Start at the top position of a biceps curl, with your elbows by your torso
- Allow your palms to rotate as you press the dumbbells overhead, finishing with your palms facing forward
- Reverse the movement as you lower the dumbbells
Coaching cue: Focus on smoothly rotating your palms during the press. Avoid rapid or jerky movements to reduce the risk of wrist strain and ensure consistent muscle engagement.
4. Dumbbell lateral raise

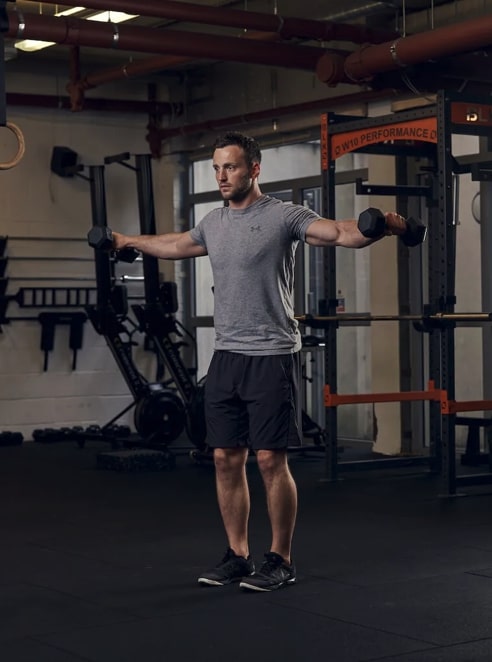
Why we like it: This isolation move shifts all the focus to your lateral deltoids, which move your arms away from your body. To make sure they’re working their hardest, angle your hands so your pinkies are slightly higher than your thumbs.
How to do the dumbbell lateral raise:
- Stand tall with your abs braced and feet close but not together, holding a light dumbbell in each hand by your sides with your palms facing one another
- Keeping a slight bend in your elbows, raise the weights out to the sides making sure you use your muscles and not momentum
- Stop just below shoulder height, then lower
Coaching cue for the dumbbell lateral raise: Focus on leading the movement with your elbows rather than your hands to better target the side delts
5. Dumbbell front raise
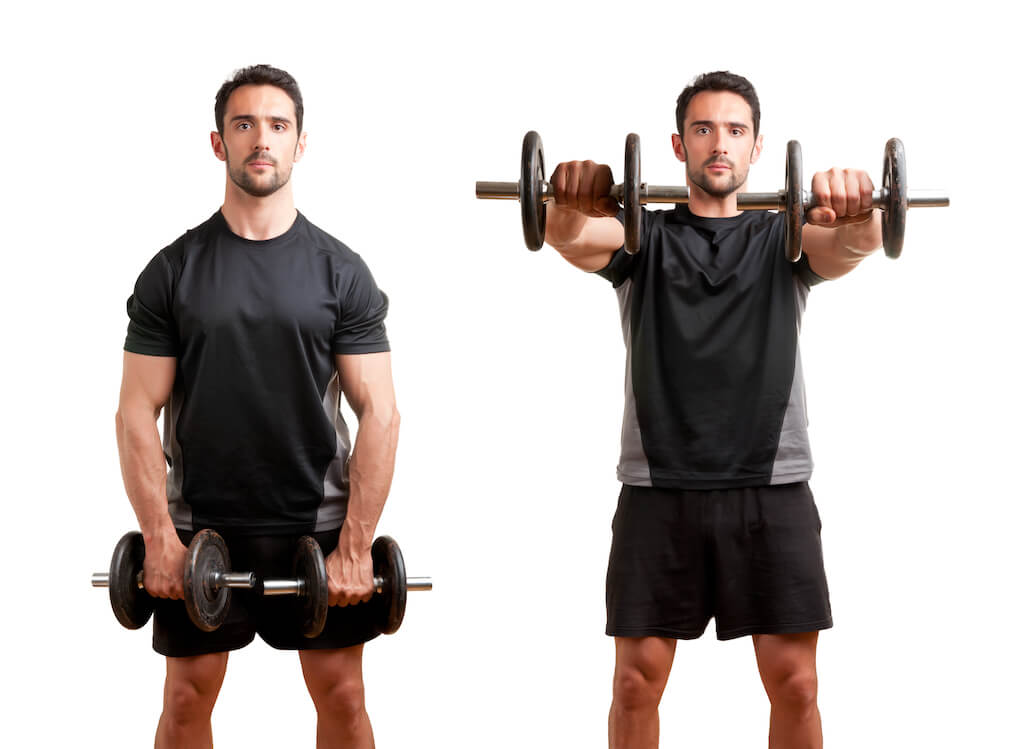
Why we like it: This move targets the anterior deltoids, which is why many lifters use it in conjunction with the lateral raise to build bigger shoulders.
How to do the dumbbell front raise:
- Stand tall with your abs braced and feet apart, holding a light dumbbell in each hand by your sides with your palms facing one another
- Keeping a slight bend in your elbows, raise the weights in front of you using your muscles and not momentum
- Stop at shoulder height, pause for a second, then slowly return to the start
Common mistakes to avoid with the dumbbell front raise:
- Using momentum: Swinging the dumbbells or using momentum to lift the weights instead of solely relying on your shoulder muscles can reduce the effectiveness of the exercise. Ensure you are lifting the weights with control and engaging your front deltoids
- Lifting too heavy: Using weights that are too heavy can compromise your form and lead to potential injury. Choose a weight that allows you to perform the exercise with proper technique while still feeling challenged
- Overarching the back: Arching your back excessively during the front raise can strain your lower back and take the focus away from your shoulders. Maintain a neutral spine throughout the movement
- Not controlling the descent: Lowering the dumbbells too quickly or allowing them to drop back down can negate the benefits of the exercise. Control the descent to fully engage your muscles throughout the entire range of motion
- Elevating the shoulders: Avoid shrugging your shoulders up toward your ears during the front raise. Keep your shoulders relaxed and focus on isolating the front deltoids
- Not maintaining proper posture: Poor posture, such as rounding the shoulders or leaning backward, can reduce the effectiveness of the exercise. Keep your chest up, shoulders back, and core engaged for stability
6. Single-arm dumbbell shoulder press
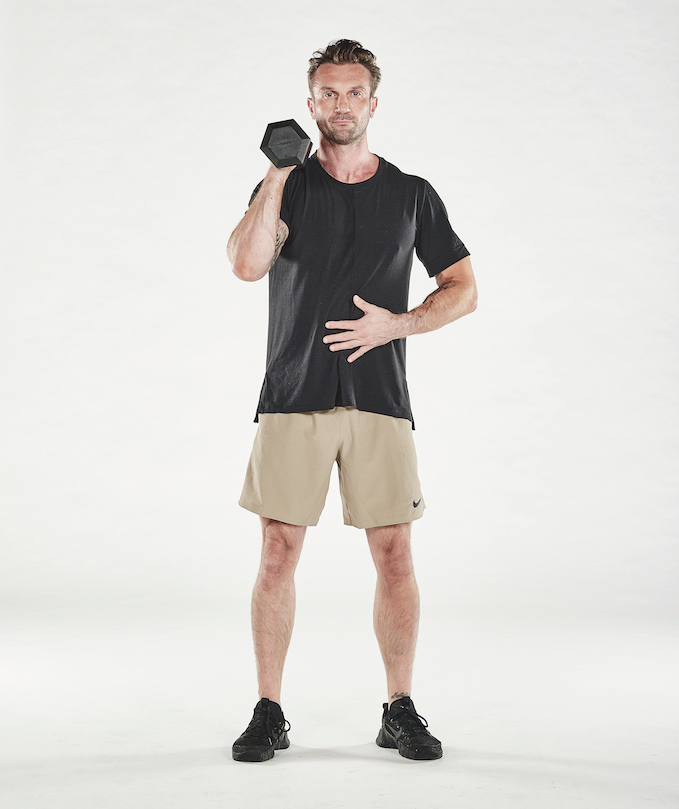
Why we like it: This move targets your shoulders while also forcing your core to work extra hard as you stabilise the weight.
How to do the single-arm dumbbell shoulder press:
- Stand tall with your chest up and core braced, holding a dumbbell at shoulder height
- Press it overhead, pause briefly, then lower
Coaching cue: Keep your shoulder down and away from your ear to avoid shrugging and maintain proper shoulder alignment.
These are our favorite dumbbell chest exercises
One of the primary advantages of using dumbbells to train chest is the ability to isolate the chest muscles effectively. By allowing for a wider range of motion compared to other equipment, dumbbells enable a deeper stretch and contraction, leading to enhanced muscle engagement and growth.
Additionally, the independent movement of each arm with dumbbells helps address any strength imbalances between the right and left sides of the chest. This focus on muscle symmetry can result in a more balanced physique. Dumbbell chest exercises also engage stabilizer muscles to a greater extent, promoting better joint stability and functional strength. Strengthening these smaller, supportive muscles can have a significant impact on overall performance and injury prevention.
From presses to flyes and pull-overs, there’s no shortage of options to target different areas of the chest and keep your workouts engaging. Not only do dumbbell exercises build muscle, but they also improve functional strength by mimicking natural movements. This type of strength is not only beneficial for the gym but also for daily activities and sports performance. Convenient, affordable, and effective, dumbbell chest exercises are a must for anyone serious about achieving a powerful and well-developed chest.
- Dumbbell bench press
- Incline dumbbell bench press
- Decline dumbbell bench press
- Dumbbell floor press
- Dumbbell flye
- Incline dumbbell flye
- Dumbbell pull-over
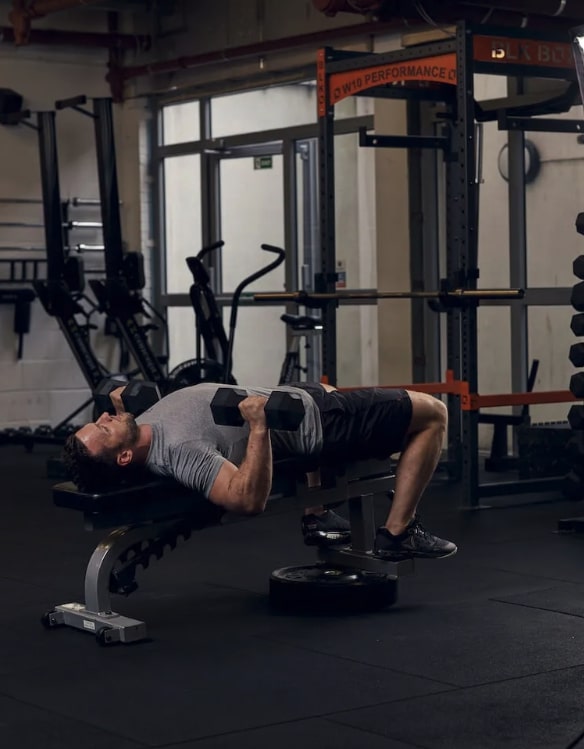
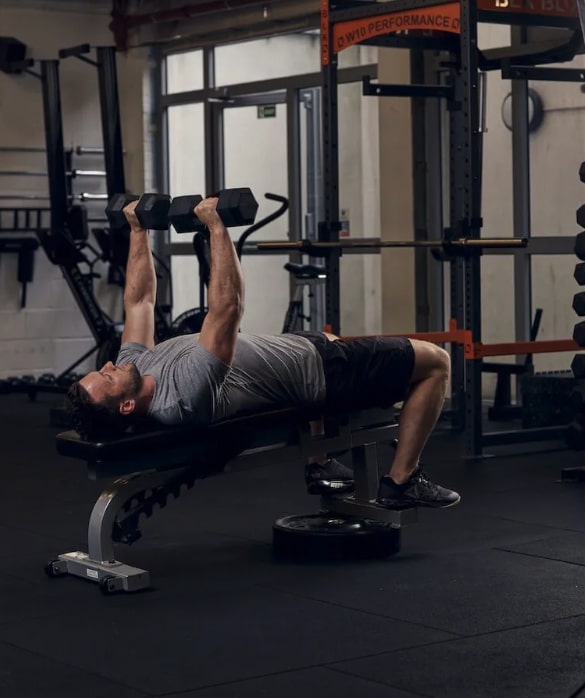
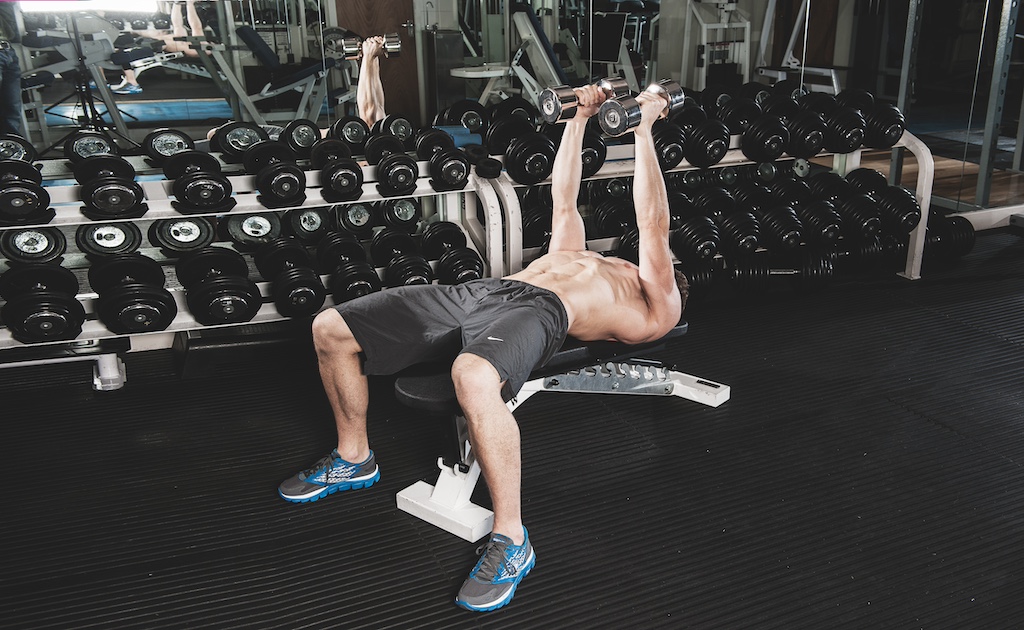
1. Dumbbell bench press
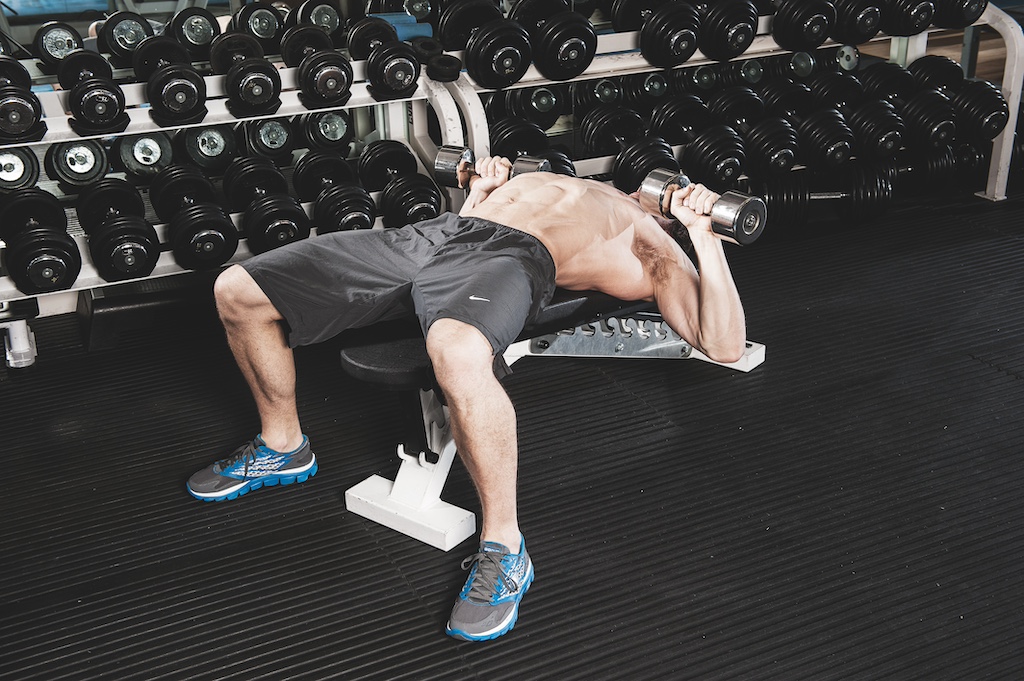
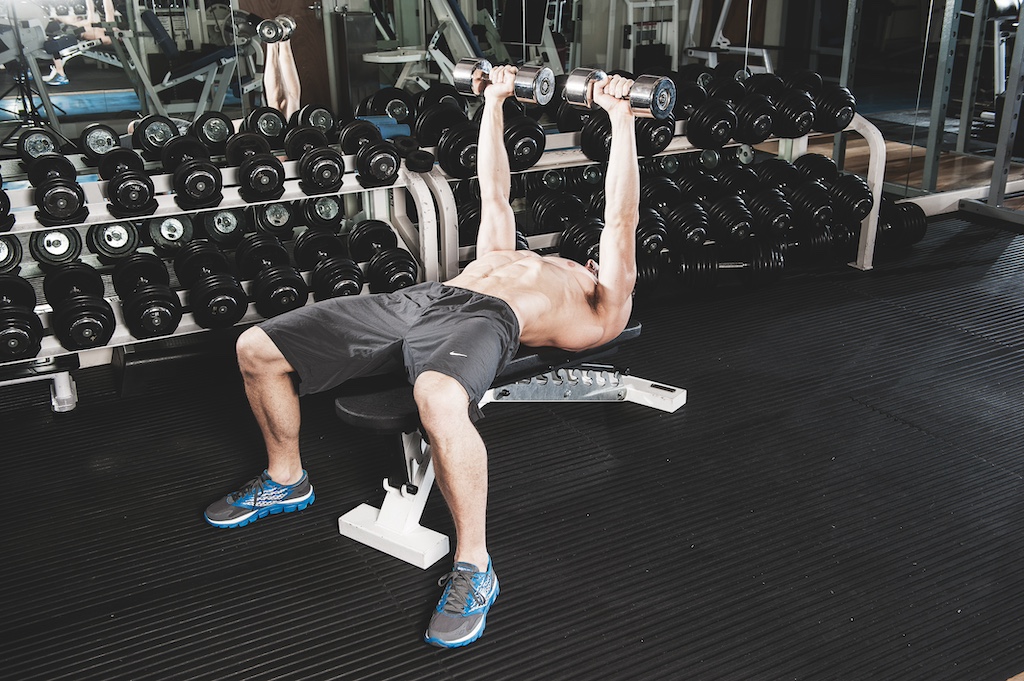
Why we like it: Using dumbbells for this classic chest-builder emphasises your pecs more than the barbell version, because the dumbbells move slightly inwards throughout the rep and also go through a greater range of motion. Benching with dumbbells is also easier and safer to do on your own, as you can lift heavy weights without needing a spotter.
How to do the dumbbell bench press:
- Lie on a bench with your feet on the floor directly underneath your knees
- Hold the dumbbells above your chest, then lower them to your chest
- Drive your feet hard into the floor and push the dumbbells back strongly to the start position
Form tip for the dumbbell bench press: While pressing the dumbbells overhead, avoid locking out your elbows at the top of the movement. Maintaining a slight bend in your elbows keeps tension on the chest muscles and reduces strain on the joints.
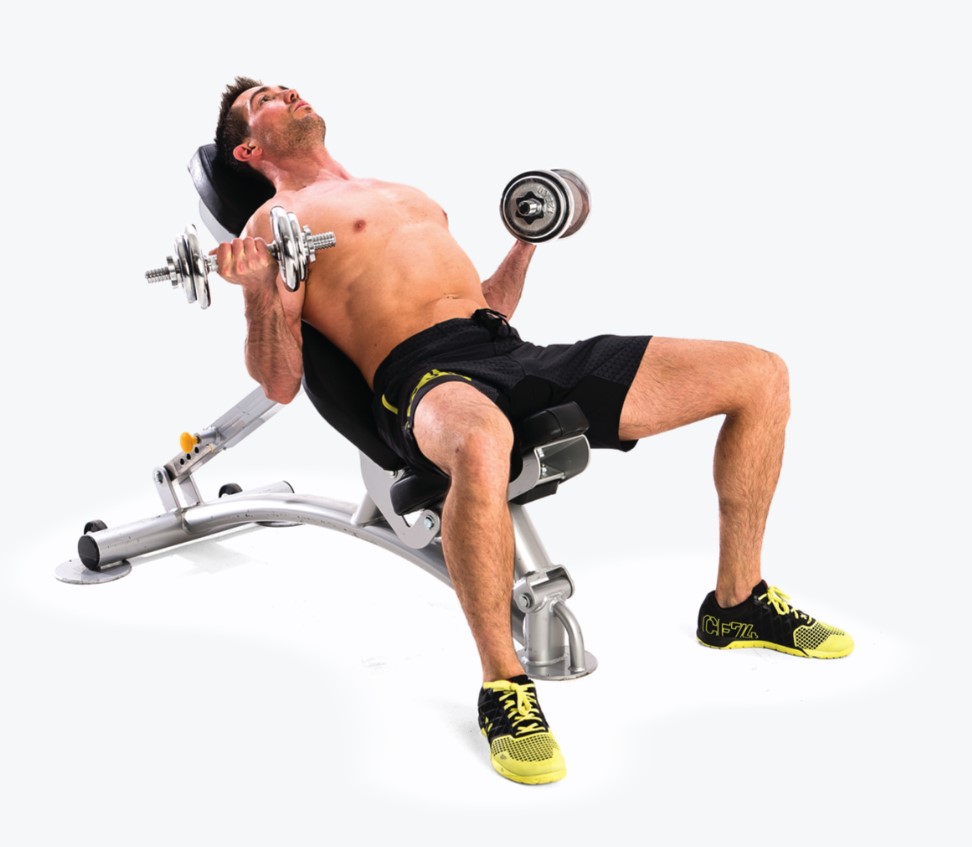
2. Incline dumbbell bench press

Why we like it: The incline angle of the bench places greater emphasis on the upper portion of your chest. The incline can also be gentler on the shoulder joints compared to flat bench presses, making this a potential alternative option for anyone with shoulder issues or those looking to minimize stress on the shoulder joints during chest workouts.
How to do the incline dumbbell bench press:
- Lie on a bench set at an angle, holding a dumbbell in each hand at chest level
- Keep your feet flat on the floor and your back against the bench
- Press the weight directly above your head but don’t lock out your elbows at the top
- Slowly lower the weights back to chest level
Form tip for the incline dumbbell bench press: Keep your shoulders stabilized and avoid shrugging or elevating them during the press. Focus on keeping your shoulder blades squeezed together and down for a stronger and more stable pressing motion.
3. Decline dumbbell bench press
Why we like it: This variation targets your lower chest better than other versions, which will help to fix imbalances and build a well-rounded chest. It also takes your shoulders further out of the equation, putting more emphasis on your chest.
How to do the decline dumbbell bench press:
- Lie on a bench set at an angle, holding a dumbbell in each hand at chest-level. (If your gym doesn’t have a decline bench, prop a weight plate under a regular bench)
- Keep your feet flat on the floor and your back against the bench
- Press the weight directly above your head but don’t lock out your elbows at the top
- Slowly lower the weights back to chest level
Form tip: Engage your core by bracing your abs and keeping your lower back in contact with the bench. This stability will help support your spine and reduce the risk of lower back strain.
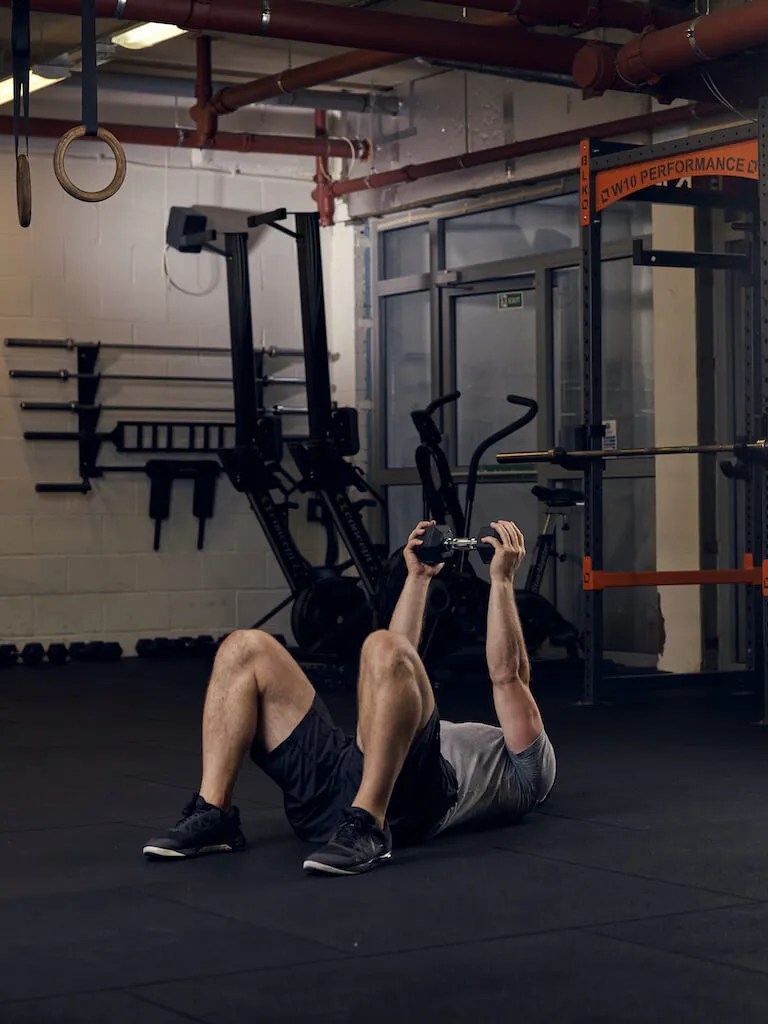
4. Dumbbell floor press
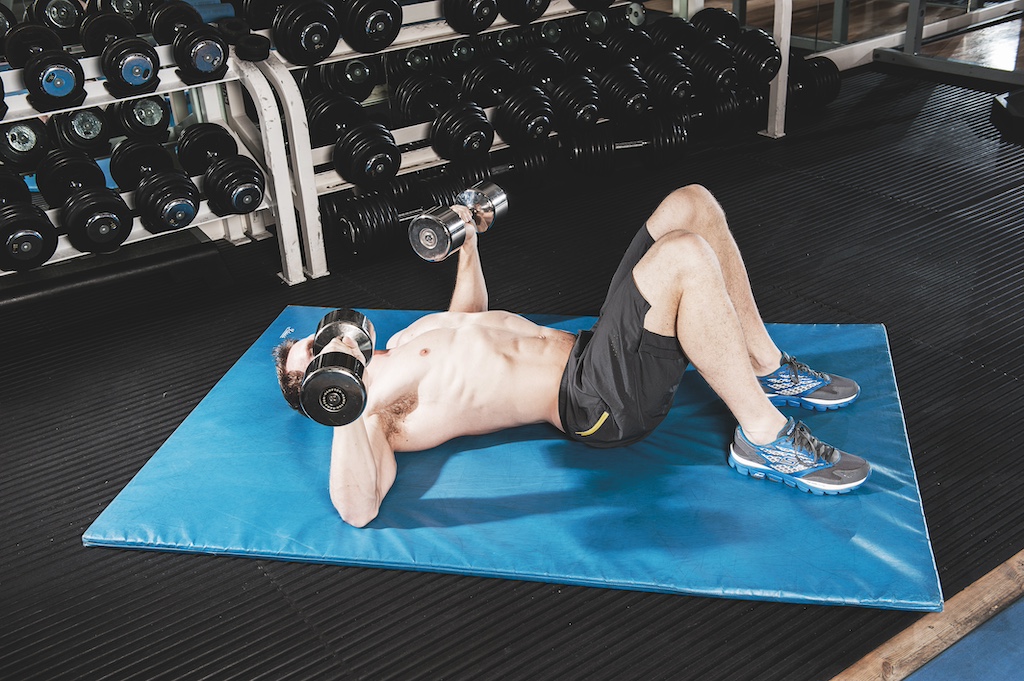
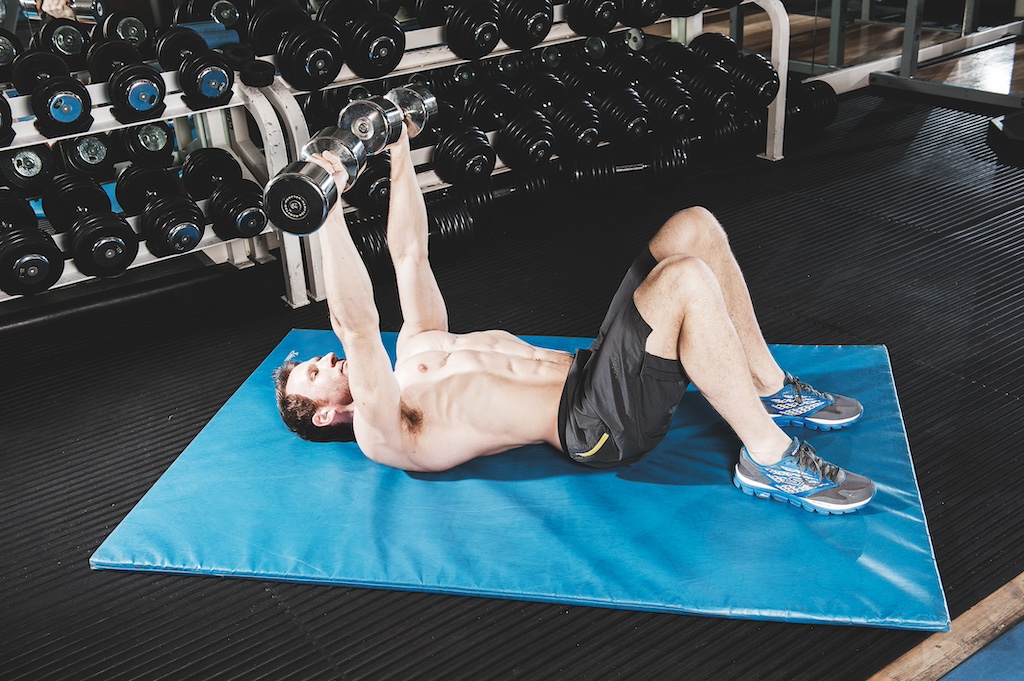
Why we like it: For more advanced lifters, the dumbbell floor press emphasizes the lockout portion of the lift, helping to strengthen the triceps and enhance the ability to complete heavier loads in other pressing movements such as bench presses and overhead presses. For beginners, the floor press can be performed at home with minimal equipment, making it a convenient option for anyone looking to strengthen their chest and triceps without access to a full gym setup.
How to do the dumbbell floor press:
- Lie on the floor with knees bent, feet flat. Hold dumbbells at chest level
- Press dumbbells up, extending your arms without fully locking out
- Lower the dumbbells back down with control, stopping just before your elbows touch the floor
- Maintain core engagement and a flat back, and control your breathing throughout
Form tip for the dumbbell floor press: Remember to breathe in as you lower the weights and exhale as you press them back up.
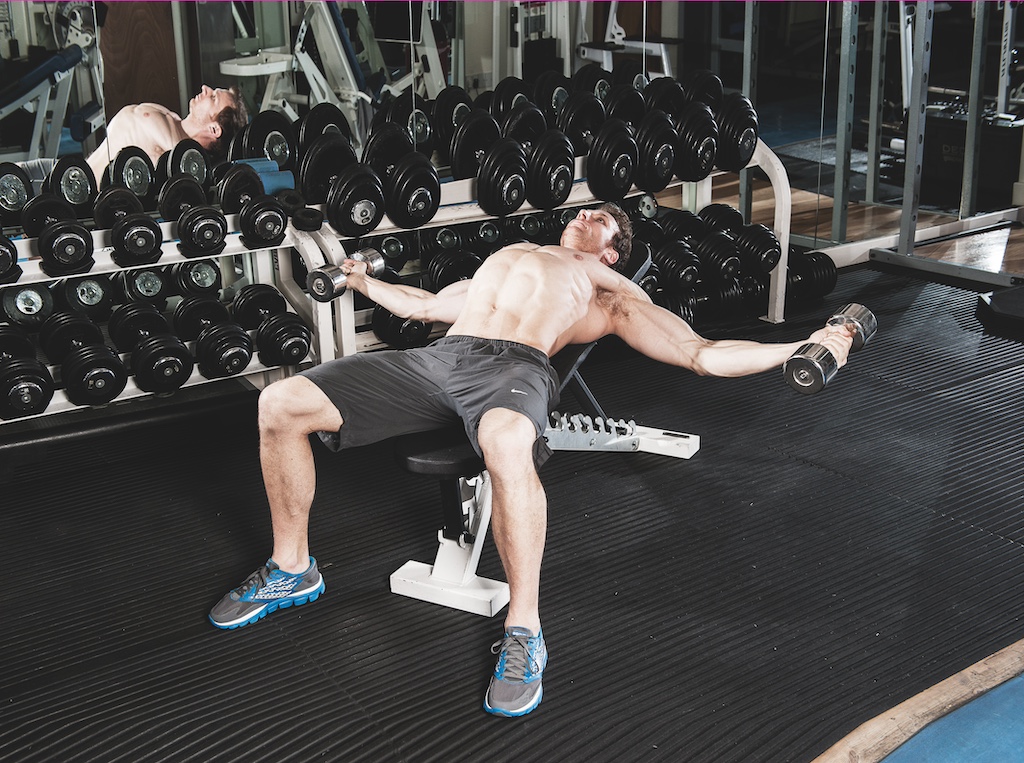
5. Dumbbell flye
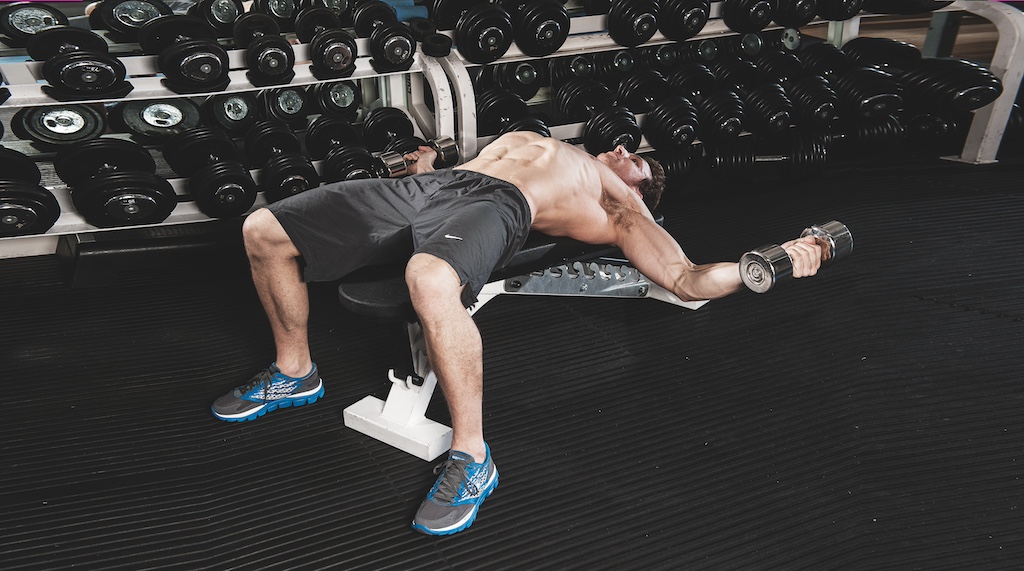
Why we like it: Because your pecs’ primary role is to move your arms inwards, this move puts much more emphasis on them than pressing variations, even though you’ll have to do it with much lighter weights.
How to do the dumbbell flye:
- Lie on a flat bench holding a dumbbell in each hand directly above your chest with your palms facing each other
- Keeping a slight bend in your elbows, slowly lower the weights to the sides as far as is comfortable, feeling the stretch in your chest
- Squeeze your chest to reverse the movement and raise the weights back to the top
Common mistakes to avoid with the dumbbell flye:
- Using excessive weight: Using weights that are too heavy can lead to improper form and potential strain on the shoulder joints. Start with a manageable weight that allows you to perform the exercise with controlled movements
- Overextending at the bottom: While it’s important to achieve a deep stretch during the flye, overextending or hyperextending the shoulders can put them at risk of injury. Focus on a controlled descent and maintain a slight bend in your elbows to protect the shoulder joints
- Flaring the elbows: Allowing your elbows to flare out excessively during flyes can shift the focus away from the chest muscles and increase the strain on the shoulder joints. Keep your elbows slightly bent and in line with your shoulders throughout the exercise
- Speeding through the movement: Performing flyes too quickly or using momentum to swing the weights can diminish the effectiveness of the exercise. Focus on controlled, deliberate movements to fully engage the chest muscles and maintain tension throughout the range of motion
- Neglecting core engagement: Failing to engage your core muscles during dumbbell flyes can lead to instability and potentially strain your lower back. Keep your core activated throughout the exercise to support your spine and maintain proper form
- Not fully extending at the top: Completing only partial range of motion at the top of the flye can limit the activation of the chest muscles. Aim to fully extend your arms without locking out your elbows at the top of the movement to maximize muscle engagement
6. Incline dumbbell flye

Why we like it: The incline angle allows for a greater range of motion compared to flat flyes, enabling a fuller and more effective stretch and contraction of the chest muscles.
How to do the incline dumbbell flye:
- Adjust an incline bench to around 30-45 degrees, and lie back with dumbbells above your chest
- Lower dumbbells out to the sides in a wide arc motion, feeling the stretch in your chest
- Bring the dumbbells back up, squeezing your chest muscles at the top
- Maintain core engagement, controlled breathing, and focus on muscle contraction throughout the movement
Form tip: Really concentrate on feeling the chest muscles working during the entire range of motion. Visualize the muscle contraction to enhance activation and ultimately growth.
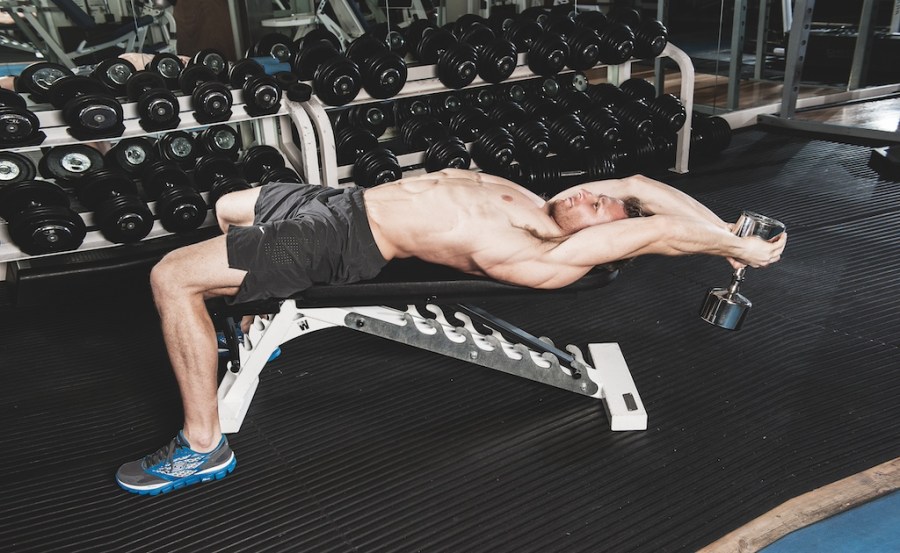
7. Dumbbell pull-over
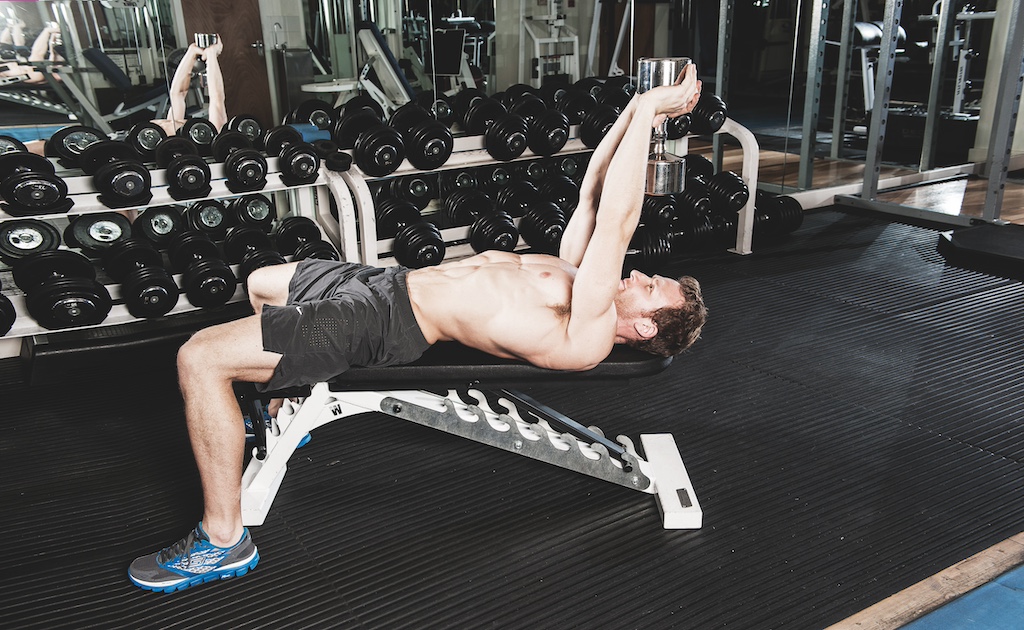
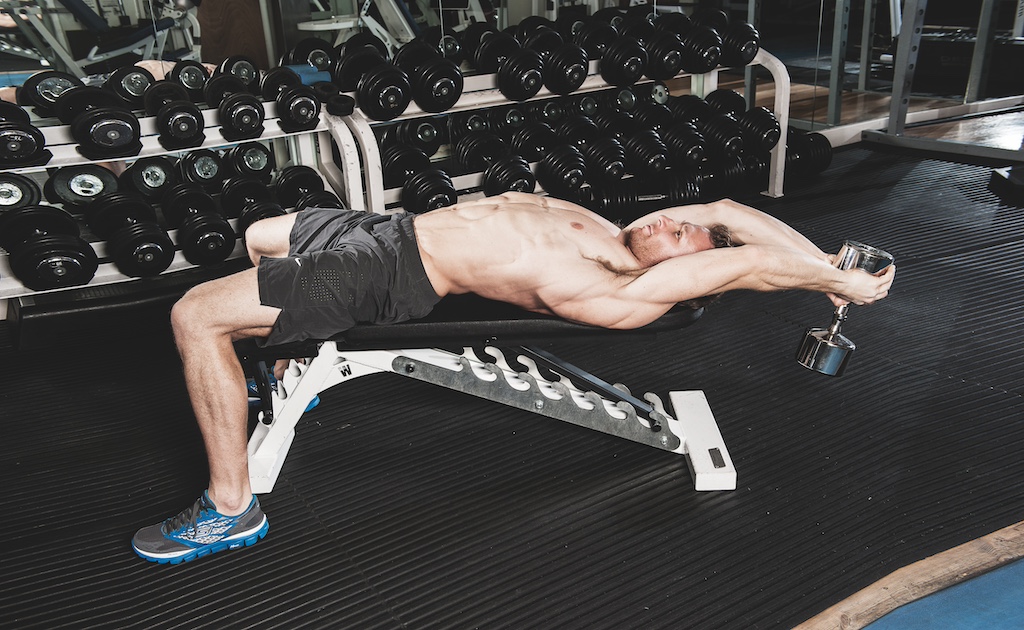
Why we like it: The pull-over is a good way to target your upper chest at the end of a workout. It provides a deep stretch and contraction, and many old-school bodybuilders swore by it.
How to do the dumbbell pull-over:
- Lie on a bench with only your upper back and shoulders supported
- Hold a dumbbell with both hands above your chest, arms slightly bent
- Lower the dumbbell back and over your head in a controlled arc motion
- Bring the dumbbell back up to the starting position using your chest and triceps
Form tip for the dumbbell pull-over: Control the movement by focusing on a smooth and deliberate motion as you lower the dumbbell over your head and engage your chest and back muscles to bring it back up.
We recommend choosing these dumbbell exercises for leg workouts
- Dumbbell goblet squat
- Dumbbell squat
- Dumbbell lunge
- Dumbbell reverse lunge
- Dumbbell side lunge
- Dumbbell split squat
- Dumbbell Bulgarian split squat
- Dumbbell Romanian deadlift
- Dumbbell single-leg Romanian deadlift
1. Dumbbell goblet squat
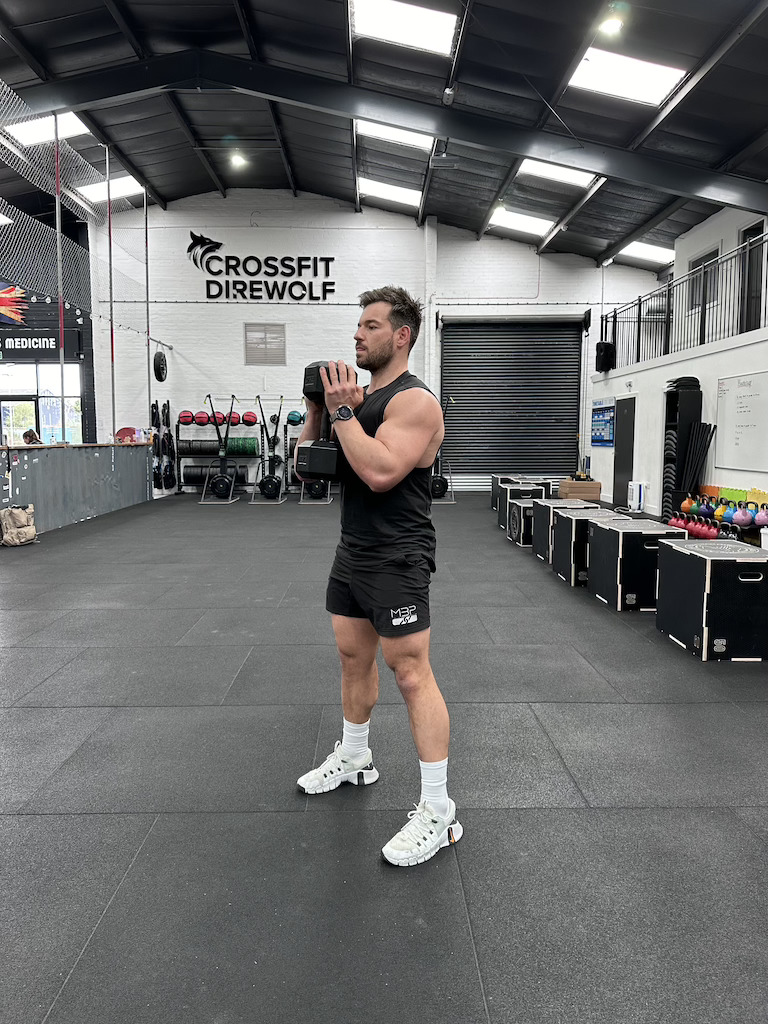
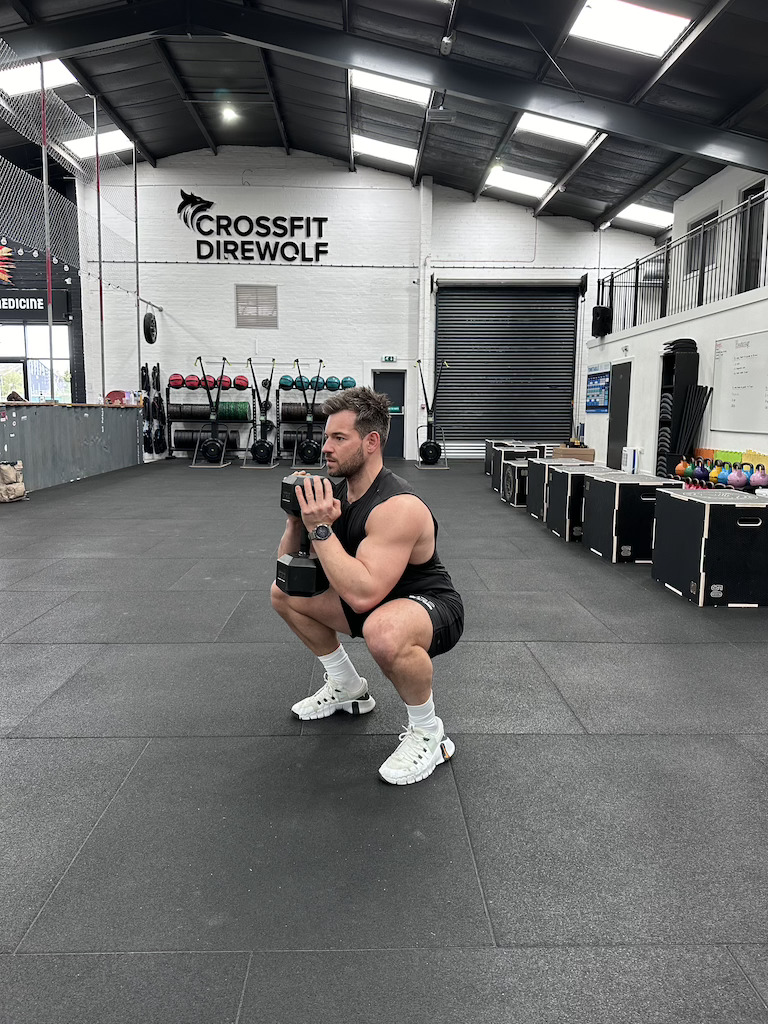
Why we like it: It’s a near-foolproof squat variation: the position of the dumbbell forces you to keep your chest up and your weight on your heels. If you’ve got hip, groin or ankle mobility issues, spend some time in the bottom position during your warm-up for a helpful weighted stretch.
How to do the dumbbell goblet squat:
- Hold a dumbbell at chest height with both hands – like a goblet – then squat down until your elbows brush the insides of your knees
- Keep your weight on your mid foot as you stand up
Common mistakes to avoid with the dumbbell goblet squat:
- Leaning too far forward: This can place excessive strain on your lower back and knees. Keep your chest up, back straight, and maintain an upright torso throughout the squat. Focus on sitting back into the squat to engage your glutes and hamstrings
- Knees caving in: Allowing your knees to collapse inward can put stress on the knee joints and lead to poor alignment. Keep knees in line with toes throughout.
- Lifting heels off the ground: This can destabilize your squat, shift the weight forward, and compromise balance. Keep your weight distributed evenly through your feet, with heels planted firmly on the ground.
- Not reaching proper depth: Failing to squat to an adequate depth can limit the engagement of the muscles and reduce the effectiveness of the exercise. Aim to lower your hips until your thighs are at least parallel to the ground or below, maintaining control throughout the full range of motion.
- Rounding the back: Allowing your back to round or arch excessively during the squat can strain the spine and lead to potential injury. Keep your spine in a neutral position, engage your core, and maintain a natural arch in your lower back throughout the movement.
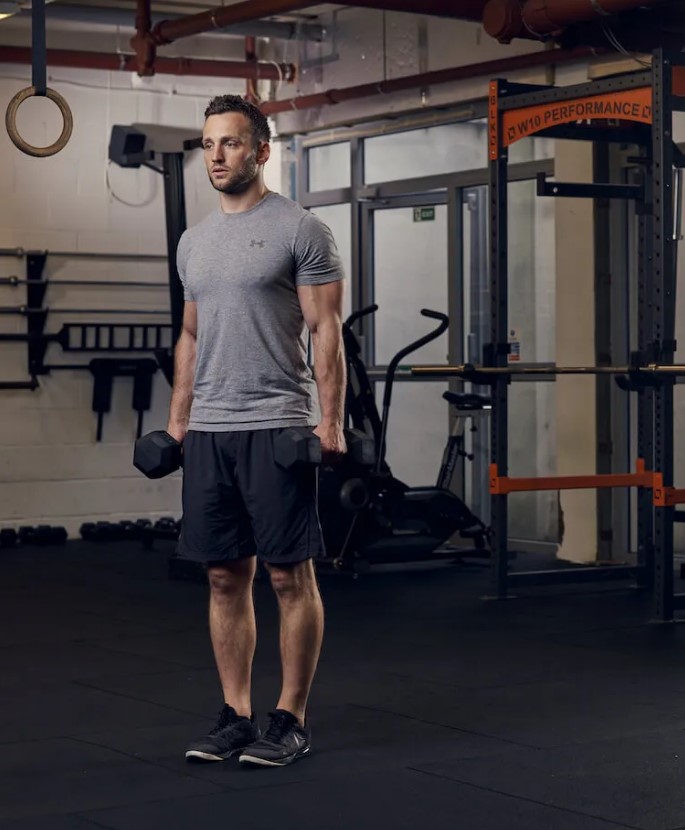
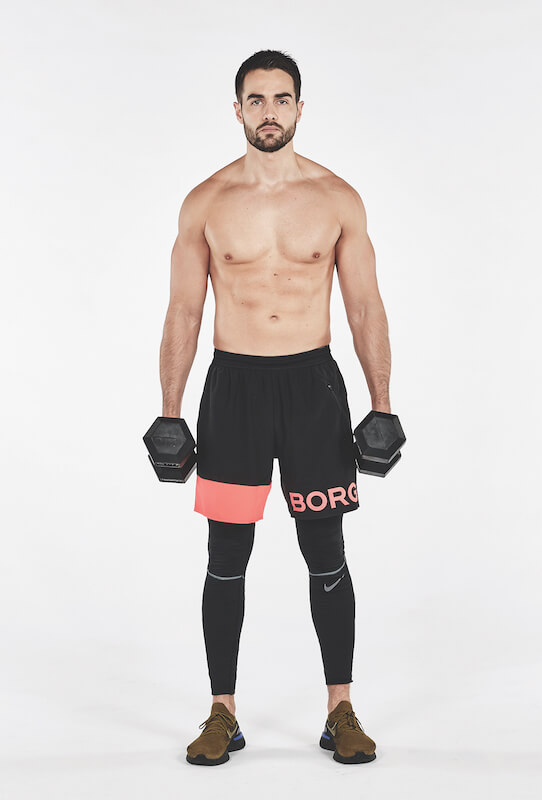
2. Dumbbell squat

Why we like it: The dumbbell squat keeps the weights in a back-friendly position, making it good for beginners and as a finisher exercise when you’re fatigued. It’ll also work your forearms and grip.
How to do the dumbbell squat:
- Hold a dumbbell in each hand by your sides and squat down, keeping your chest up, until your hip crease is below the level of your knees
- Drive back up through your heels
Form tip: Keep your chest up and look forward to help maintain an upright torso position. This aligns your spine and helps distribute the load evenly.
3. Dumbbell lunge
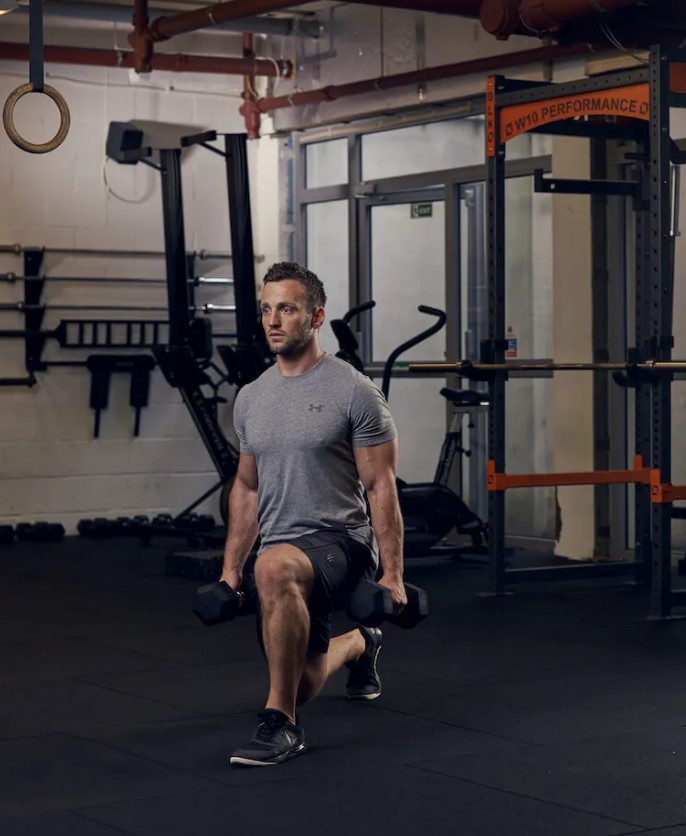
Why we like it: Working one leg at a time builds unilateral strength and also ensures you don’t have any weaknesses from imbalances in your body. If you’re limited by your grip, hold the dumbbell in front of your chest, goblet-squat style, or use a set of lifting straps.
How to do the dumbbell lunge:
- Holding a dumbbell in each hand, take one step forwards and lower your body until both knees are bent at 90 degrees
- Push off your front foot to reverse the movement
Coaching cues for the dumbbell lunge:
- Keep your chest up: Maintain an upright posture throughout the lunge by keeping your chest up and shoulders back. This helps engage your core and prevent rounding of the back
- Step forward with control: Take a controlled step forward to initiate the lunge, ensuring your front knee stays behind your toes. This helps protect your knee joint and promotes proper alignment
- Lower your back knee: Aim to lower your back knee towards the ground without letting it touch the floor. This ensures a full range of motion and engages your leg muscles effectively
- Drive through the heel: As you push yourself back up from the lunge, focus on driving through your front heel to engage your glutes and hamstrings
- Keep your core tight: Engage your core muscles throughout the movement to stabilize your torso and maintain balance. A strong core helps prevent any unnecessary movement or strain on your lower back
4. Dumbbell reverse lunge

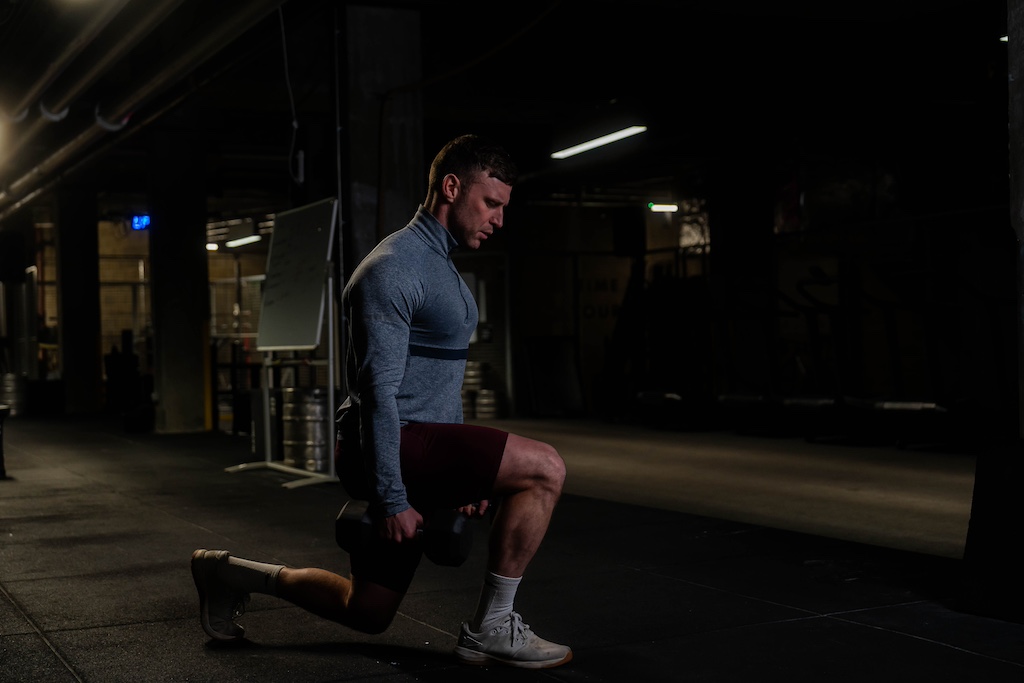
Why we like it: Stepping back instead of forward shifts the emphasis to your glutes, but also makes the lunge slightly safer, because it’s easier to stop your front knee from wobbling off-line. If you’re fatigued, do these.
How to do the dumbbell reverse lunge:
- Hold a dumbbell in each hand
- Take a controlled step back with one leg, lowering your back knee towards the ground while keeping your front knee in line with your toes
- Push off your rear foot to reverse the movement
Form tip for the dumbbell reverse lunge: Keep your core muscles engaged to stabilize your torso and maintain proper posture throughout the movement.
5. Dumbbell side lunge
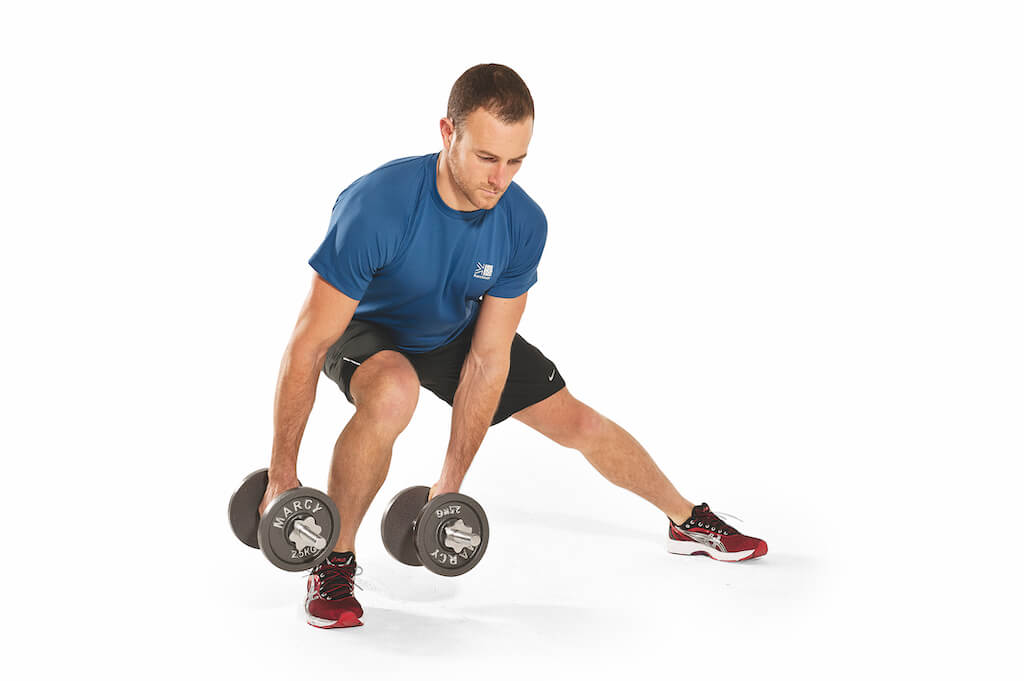
Why we like it: The side lunge requires you to move laterally, which can help improve hip mobility and flexibility. It also engages the inner and outer thighs, glutes, quads, and hamstrings.
How to do the dumbbell side lunge:
- Holding a dumbbell in each hand, take one step sideways and lower your body until one of your knees is bent at a right angle, feeling a slight stretch in your groin
- Push off your foot to reverse the movement
Common mistakes to avoid with the dumbbell side lunge:
- Collapsing the knee inwards: Allowing the knee to collapse inwards during a side lunge can put strain on the knee joint and lead to poor alignment. Focus on keeping your knee in line with your toes as you lower into the lunge
- Leaning too far forward: Leaning too far forward during a side lunge can place excessive strain on the lower back and compromise proper form. Keep your chest up, back straight, and maintain an upright torso throughout the movement
6. Dumbbell split squat
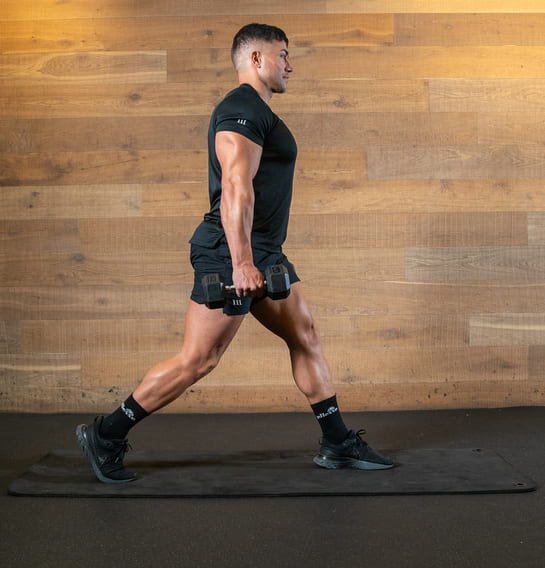
Why we like it: Think of it like a lunge, without the lunging motion. As a result, you can go a bit heavier with these to really work your core as well as your lower body.
How to do the dumbbell split squat:
- Start in a split stance, with one foot in front of the other, holding a dumbbell in each hand
- Lean slightly forward, over your lead leg
- Bend both legs until your trailing knee touches the floor
- Straighten both legs to return to the start, then go straight into the next rep
Form tip: As you push yourself back up to the starting position, concentrate on driving through the heel of your front foot to engage your glutes and quads.
7. Dumbbell Bulgarian split squat
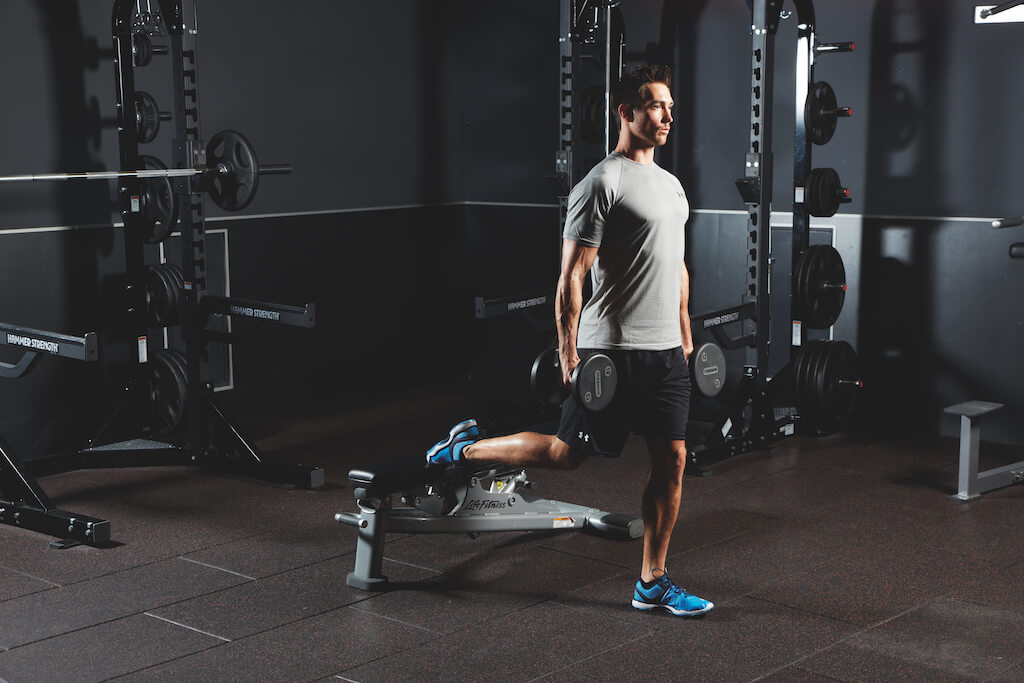
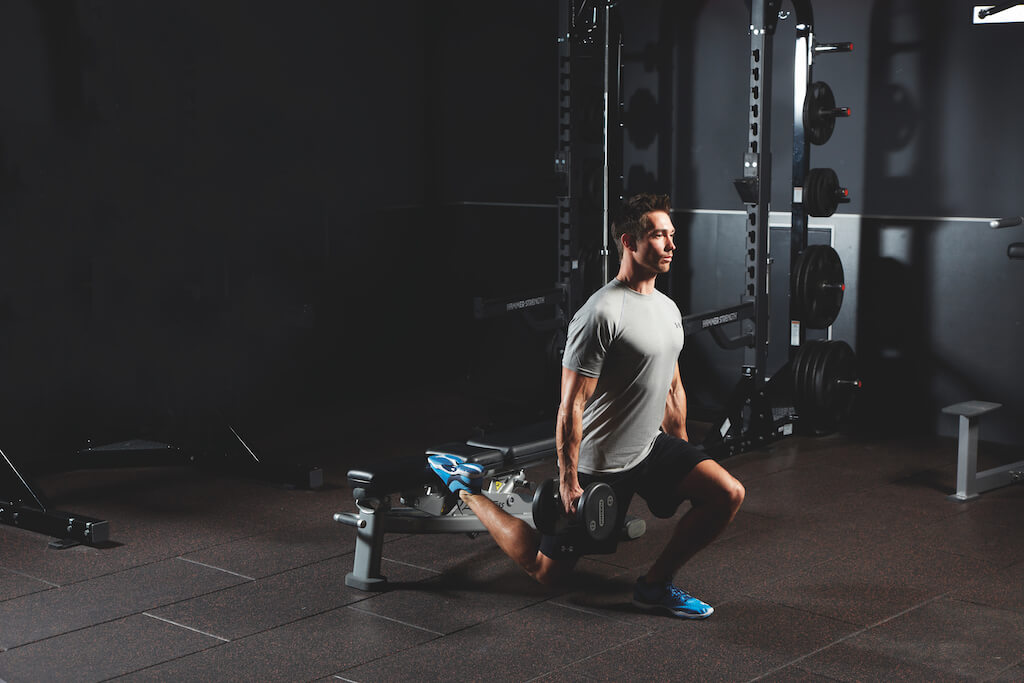
Why we like it: Since the Bulgarian split squat is performed with one leg elevated, it helps correct muscle imbalances between the left and right legs. You can also adjust the angle to make it more quad- or glute-dominant: put your lead foot a bit further forward to hit the glutes more; further back for more of a quad focus.
How to do the dumbbell Bulgarian split squat:
- Start by standing a few feet in front of a bench or elevated surface with a dumbbell in each hand
- Place one foot behind you on the bench, ensuring the top of your foot is resting on the surface
- Lower your body by bending your front knee and lowering your back knee towards the floor
- Drive through the heel of your front foot to return to the starting position
Common mistakes to avoid with the dumbbell Bulgarian split squat:
- Placing too much weight on the rear foot: This can cause instability and put excessive strain on the knee. Ensure most of your weight is on the front foot
- Arching the back: This can lead to lower back strain. Maintain a neutral spine by engaging your core muscles and keeping your back straight
- Not fully engaging the core: Failing to engage the core muscles can lead to poor stability and balance. Remember to brace your core throughout the exercise to support your lower back and maintain proper form
- Using improper bench height: Using a bench that is too high or too low can affect the range of motion and proper alignment during Bulgarian split squats. Choose a bench height that allows your front thigh to be parallel to the ground when performing the exercise
8. Dumbbell Romanian deadlift
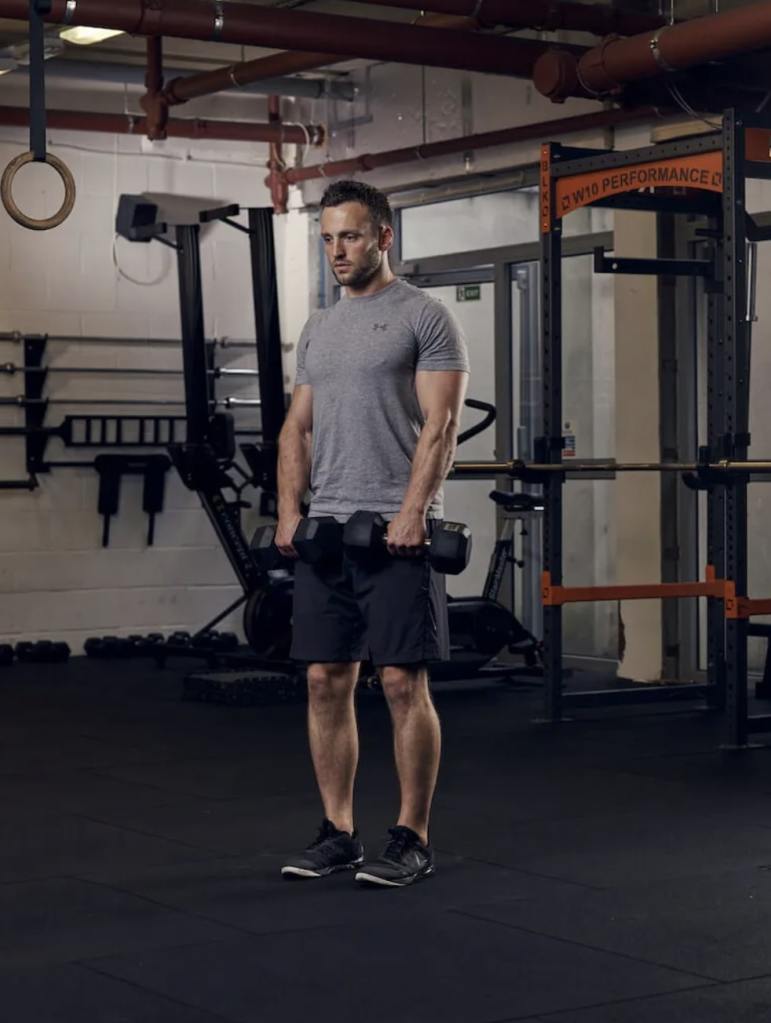
Why we like it: This deadlift variation shifts the emphasis to your hamstrings, but your entire posterior chain will be benefitted. Performing Romanian deadlifts helps improve hip hinge mechanics, teaching proper movement patterns and hip flexibility.
How to do the dumbbell Romanian deadlift:
- Stand tall with feet shoulder-width apart, holding a dumbbell in each hand
- Keeping your legs straight, hinge from the hips and lower the weights down the fronts of your shins until you feel a good stretch in your hamstrings
- Reverse the move to the start and squeeze your glutes
Common mistakes to avoid with the dumbbell Romanian deadlift:
- Rounding the back: Allowing the back to round can put excessive strain on the lower back and increase the risk of injury. Maintain a neutral spine by keeping your chest up, back flat, and shoulders back throughout
- Bending the knees too much: While there is a slight bend in the knees, bending them too much can shift the emphasis away from the hamstrings and onto the quads. Keep a slight bend in the knees and focus on hinging at the hips
- Not engaging the core: Failing to engage the core muscles can lead to instability and poor form. Keep your core tight throughout to support your lower back and maintain proper alignment.
- Overextending at the top: Avoid hyperextending your lower back at the top of the movement. Instead, focus on squeezing your glutes and maintaining a neutral spine position to avoid putting unnecessary stress on your back
9. Dumbbell single-leg Romanian deadlift
Why we like it: The single-leg version challenges your balance and proprioception while firing up your hamstrings.
How to do the dumbbell single-leg Romanian deadlift:
- Stand with a dumbbell in each hand, palms facing your body, and feet hip-width apart
- Shift your weight onto one leg while keeping a slight bend in the knee of the supporting leg
- Hinge at the hips and slowly lower the dumbbells towards the ground while simultaneously lifting the non-supporting leg straight back behind you
- Keep your back flat, chest up, and core engaged as you lower the dumbbells towards the ground
- Lower the dumbbells until you feel a stretch in your hamstrings, then push through the heel of the supporting leg to return to the starting position
Form tip for the dumbbell single-leg Romanian deadlift: Initiate the movement by hinging at the hips and pushing your hips back as you lower the dumbbells towards the ground. Keep a slight bend in the supporting knee to prevent hyperextension.
Here are our go-to dumbbell exercises for arms
When it comes to sculpting powerful, defined arms, dumbbells are an invaluable tool in your training arsenal. One of the primary advantages of using dumbbells for arm training is their ability to promote balanced muscle development. Unlike barbells or machines, which can sometimes allow the stronger side of your body to compensate for the weaker side, dumbbells ensure that each arm works independently. This independence prevents muscle imbalances and encourages symmetrical growth, leading to well-proportioned, aesthetically pleasing arms.
Dumbbells also offer a versatile range of movement that can closely mimic natural body motions. This versatility allows you to perform various exercises that target different parts of the arms, from biceps curls and hammer curls to triceps extensions. By allowing your arms to move more freely, dumbbells can engage more muscle fibers during each exercise, increasing muscle activation and growth. Moreover, the rotational freedom provided by dumbbells can help reduce strain on your joints, leading to safer and more effective workouts.
Another notable benefit of incorporating dumbbells into your arm workouts is the greater range of motion they offer. Dumbbells allow for a full extension and contraction of the muscles, which is crucial for optimal strength and hypertrophy gains. Fully extending your arms during biceps curls or triceps extensions ensures you’re working the muscles through their entire range, providing a thorough muscle stimulus that can lead to greater size and strength improvements.
Lastly, using dumbbells can enhance your functional strength and stability. Many dumbbell exercises require the use of stabilizer muscles to maintain balance and control throughout the movement. For example, when performing a standing dumbbell curl, your core, shoulders, and even legs are engaged to keep your body stable. This type of functional training not only builds impressive arms but also improves overall athleticism and coordination, translating to better performance in various physical activities and sports.
Incorporating dumbbells into your arm training routine can lead to a more balanced, effective, and comprehensive workout, helping you achieve those strong, well-defined, sleeve-filling arms you’ve been striving for.
- Dumbbell biceps curl
- Alternating dumbbell biceps curl
- Dumbbell hammer curl
- Dumbbell zottman curl
- Dumbbell incline biceps curl
- Dumbbell triceps extension
- Dumbbell skullcrusher
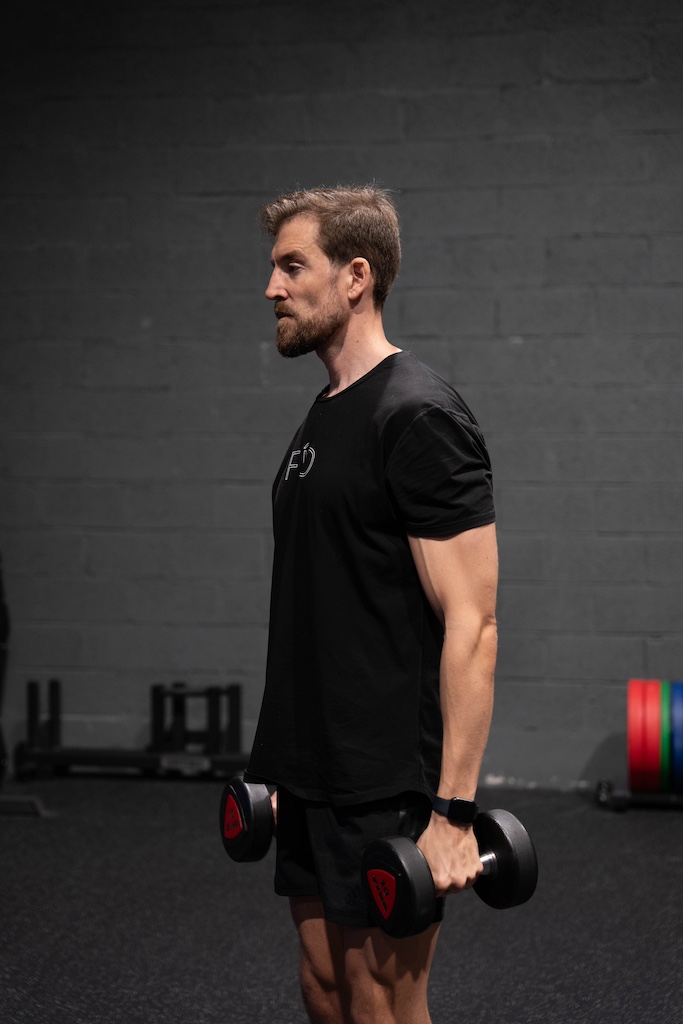
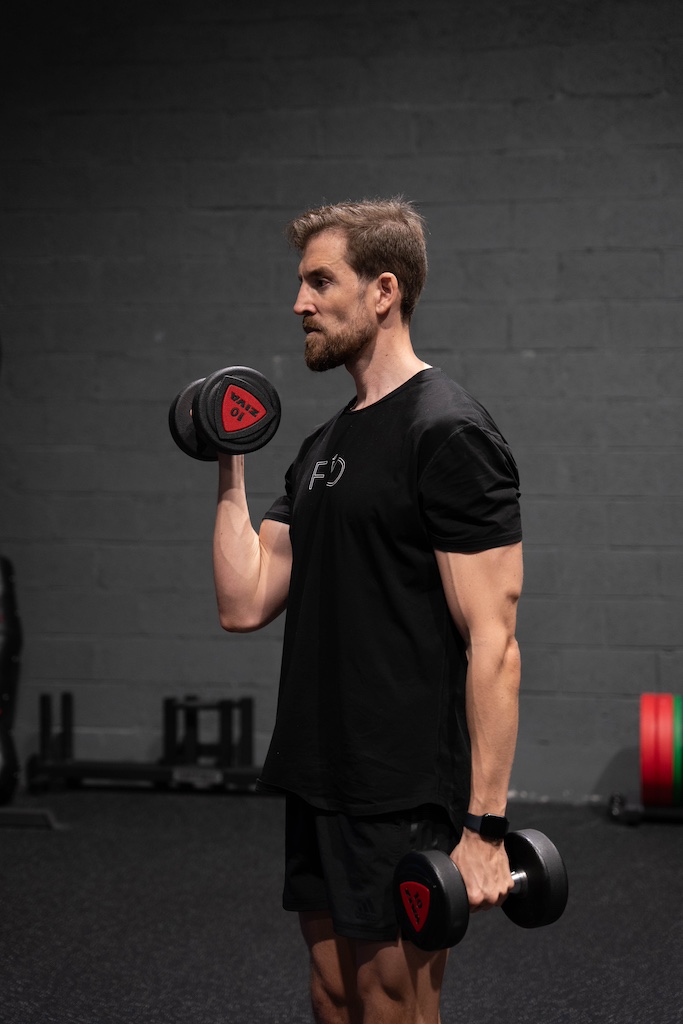
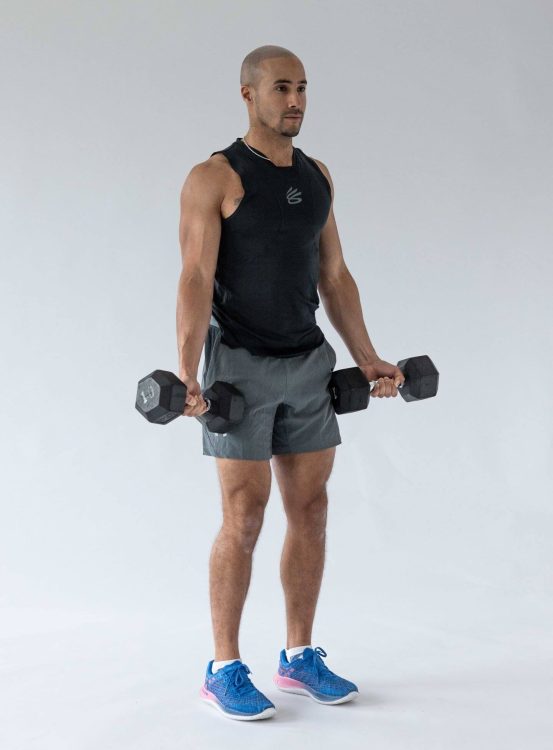
1. Dumbbell biceps curl
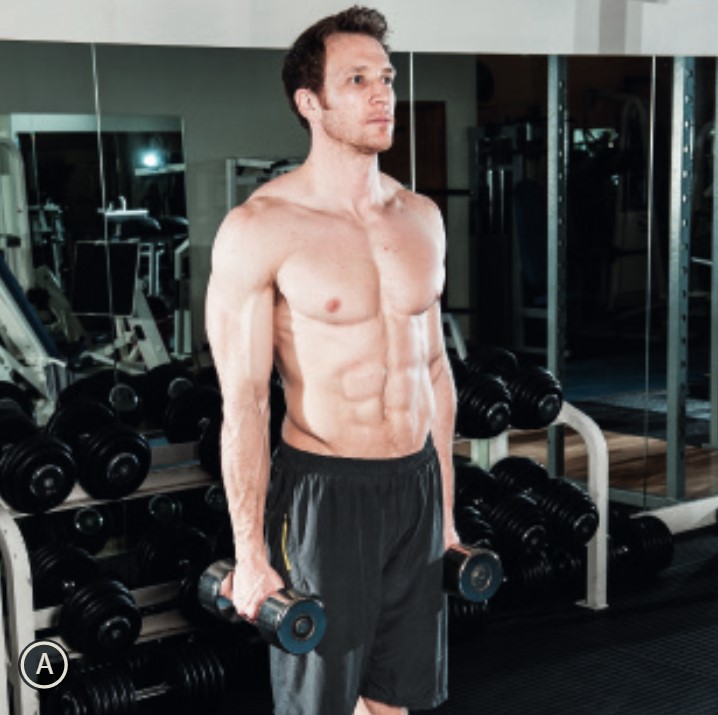
Why we like it: It’s the classic. Done correctly, a slow, controlled biceps curl is one of the best ways to put your biceps under the extended tension needed for growth. For best results, don’t let the tension off your muscles at any point during the move.
How to do the dumbbell biceps curl:
- Stand tall with your shoulders back and feet close together, holding a pair of dumbbells with palms facing in
- Keeping your elbows tucked in to your sides, curl the dumbbells up towards your chest, stopping just before your forearms reach vertical
- Lower under control to return to the start position
Coaching cues for the dumbbell biceps curl:
- Avoid compensations: Keep your elbows tucked close to your sides and prevent them from drifting forward or backward during the curl
- Stop momentum: Avoid using your back or shoulders to lift the weights; instead, isolate the biceps by keeping the rest of your body still
2. Alternating dumbbell biceps curl
Why we like it: Done at the end of a set of biceps curls, the alternating variety can let you squeeze out a few extra reps, increasing the damage to the muscle and the growth you’ll see afterwards. Using these on their own is less advisable because they’ll give your biceps too long to rest between reps.
How to do the alternating dumbbell biceps curl:
- Stand tall with your shoulders back and feet close together, holding a pair of dumbbells with your palms facing forward
- Keeping your elbows tucked in to your sides, curl one dumbbell up towards your chest, then lower it and raise the other
Form tip: Prevent your shoulders from shrugging – keep them relaxed to focus the effort on your biceps.
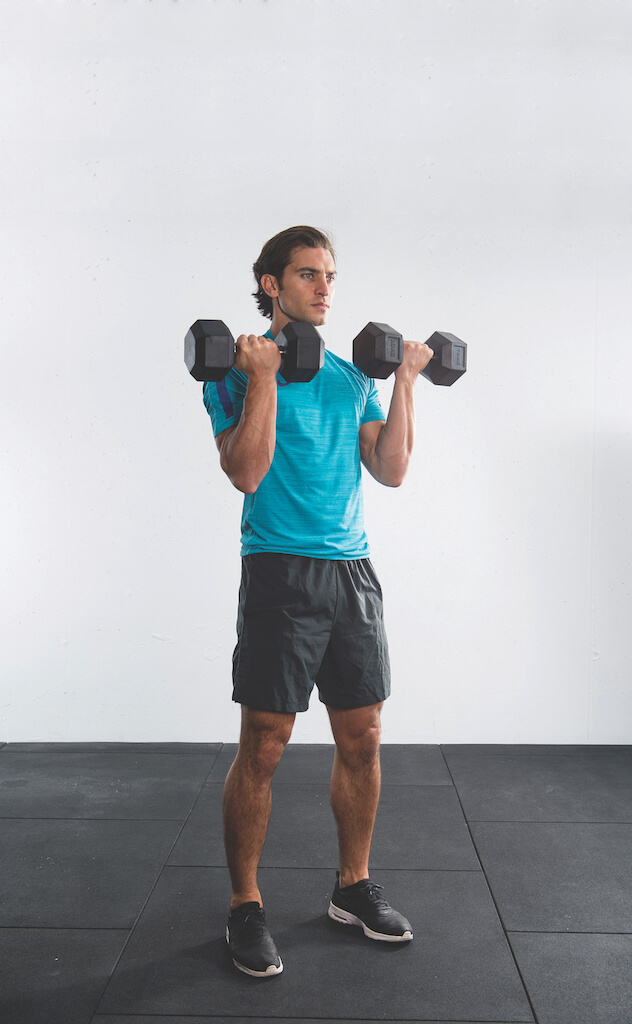
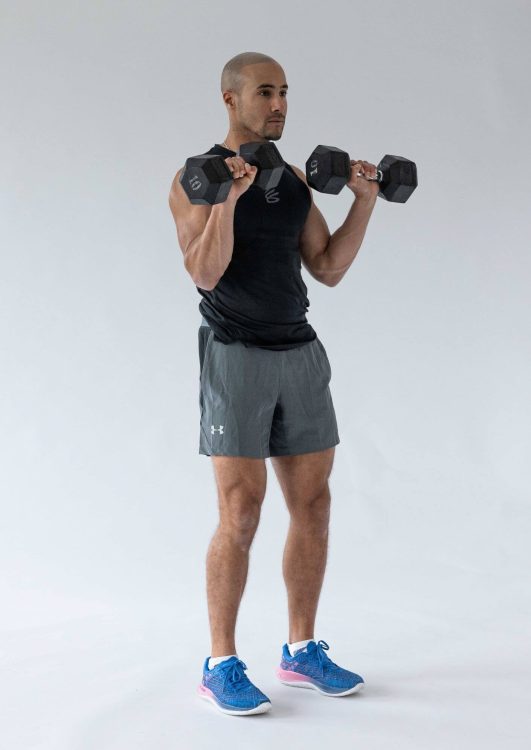
3. Dumbbell hammer curl
Why we like it: Though it works similar muscles to the biceps curl, the hammer curl puts extra emphasis on the brachioradialis, which pushes up on your biceps to make the muscles appear bigger. They’ll also work well in combination with biceps curls for a technical drop set that takes your biceps past failure.
How to do the dumbbell hammer curl:
- Stand tall with your shoulders back and feet close together, holding a pair of dumbbells with your palms facing your sides
- Keeping your elbows tucked in to your sides, curl the dumbbells up towards your chest, stopping just before your forearms reach vertical
- Lower under control to return to the start position
- As with biceps curls, perform alternating hammer curls at the end of your sets to squeeze out some extra muscle-pumping reps
Common mistakes to avoid with the dumbbell hammer curl:
- Elbow flare: Allowing your elbows to flare outwards during the curl can shift the emphasis away from the biceps and brachialis. Keep elbows tucked in throughout
- Inadequate range of motion: Not fully extending your arms at the bottom of the movement or not bringing the dumbbells all the way up to your shoulders can limit muscle activation and growth
- Wrist bending: Letting your wrists bend backward or forward can place unnecessary strain on the wrist joints and reduce the effectiveness of the exercise. Keep your wrists in a neutral position
4. Dumbbell zottman curl
Why we like it: This curl variation gets its name from George Zottman, a 19th century strongman. Zottman was known for his impressive arm strength and unique training methods, and the exercise was named in his honor. The move targets the muscles on the front of your upper arm with every rep, using both heads of the biceps – brachii and brachialis – on the way up, and the brachioradialis when you go palms-down for the descent. The twist also adds some extra stimulation for an all-around arm builder.
How to do the dumbbell zottman curl:
- Hold a dumbbell in each arm and curl them up to chest height
- Twist your palms to face downwards before you lower, shifting the focus to your forearms
Form tip: Ensure the rotation of your wrists is smooth and controlled to maintain muscle tension.
5. Dumbbell incline biceps curl
Why we like it: This move puts more emphasis on the biceps brachii, which is the largest and most visible of the biceps muscles. You’ll probably need to use less weight than you would on the standing curl, but it’s worth the effort.
How to do the dumbbell incline biceps curl:
- Sit on a bench set to an incline between 30 and 45 degrees, holding a dumbbell in each hand
- Keeping your back flat against the bench and your elbows close to your sides, curl both dumbbells up to shoulder height
- Squeeze your biceps at the top of the move, then slowly return the start
Coaching cue for the dumbbell incline biceps curl: Keep your shoulders in contact with the bench at all times – don’t let them roll forward or lift off during the curl. This focuses the effort on your biceps and minimizes the contribution from your shoulders.
6. Dumbbell triceps extension
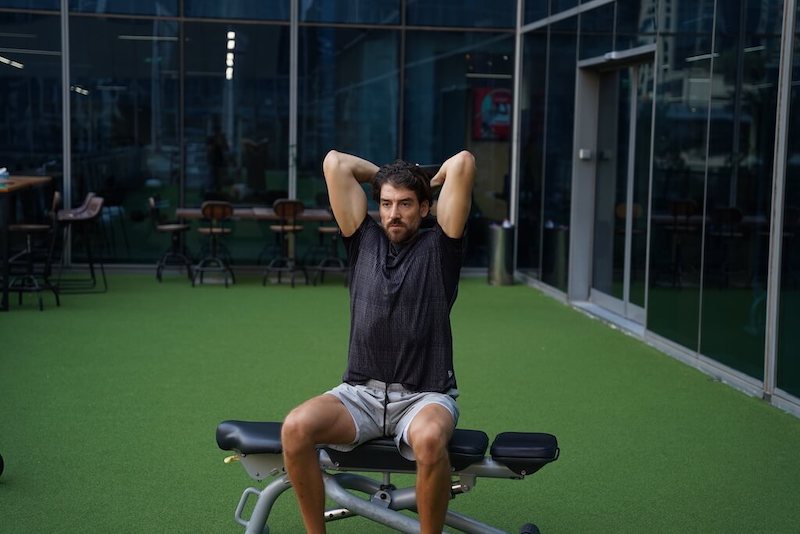
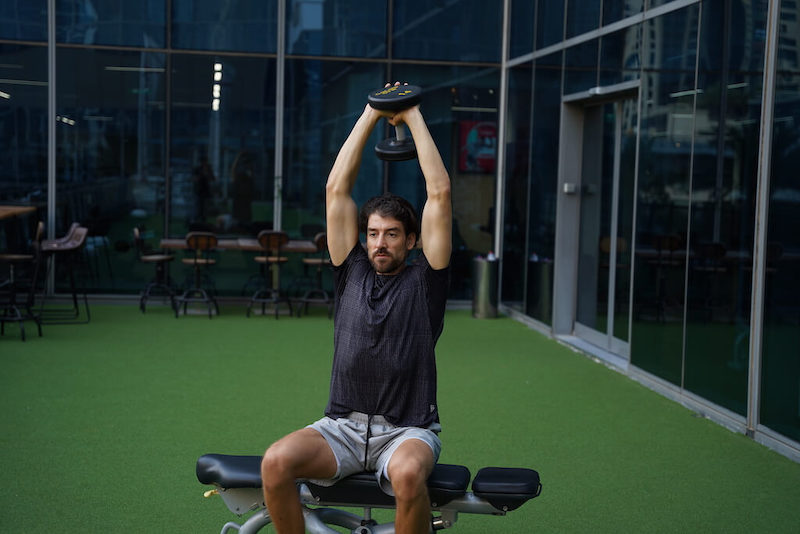
Why we like it: It emphasizes the long head of the tricep, which is often harder to fully engage with other exercises. As well as working the largest muscle in your arms, the triceps extension forces your core to stabilise you, giving you some extra core work as you lift.
How to do the dumbbell triceps extension:
- Sit on a bench and hold a dumbbell with both hands, grasping it by the upper end. Extend your arms fully above your head, keeping your elbows close to your ears
- Keep your core engaged and your back straight. Maintain an upright posture without arching your back
- Slowly lower the dumbbell behind your head by bending your elbows, keeping your upper arms stationary. Lower the weight until your forearms touch your biceps
- Press the dumbbell back up to the starting position by straightening your arms. Focus on squeezing your triceps at the top of the movement without locking out your elbows
Common mistakes to avoid with the dumbbell triceps extension:
- Elbow flaring: Allowing your elbows to flare out to the sides during the movement reduces the isolation of the triceps and can cause shoulder strain
- Using too much weight: Using a weight that’s too heavy can lead to poor form, excessive swinging, and increased risk of injury
- Inadequate range of motion Not lowering the dumbbell far enough behind your head can limit muscle engagement and reduce the effectiveness of the exercise
- Arching the back: Arching your back excessively during the exercise can put unnecessary strain on your lower back and reduce core stability
7. Dumbbell skullcrusher
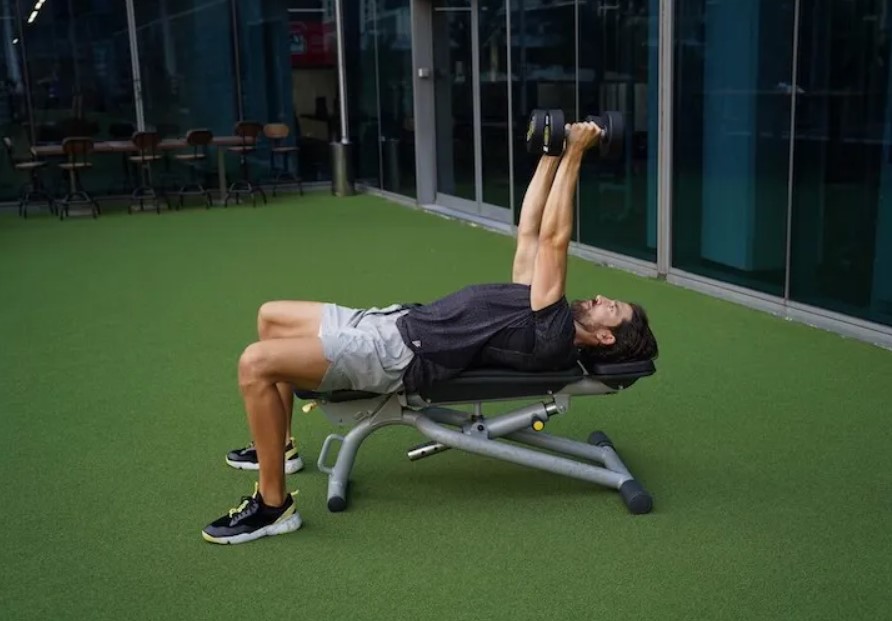
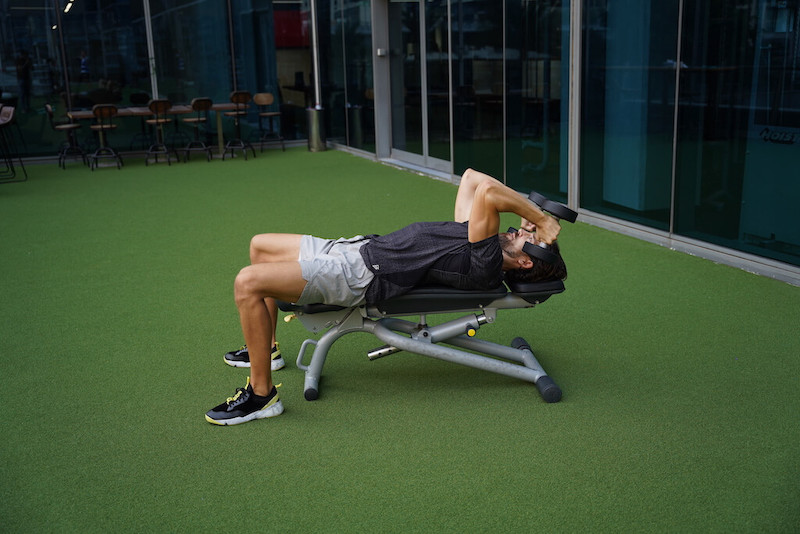
Why we like it: Skullcrushers also effectively work the long head of the triceps, which can lead to more defined and toned upper arms. This exercise can help you achieve that coveted ‘horseshoe’ triceps appearance.
How to do the dumbbell skullcrusher:
- Lie flat on a bench, holding dumbbells with arms extended straight up and palms facing each other
- Keep your upper arms stationary and elbows pointed up, then slowly lower dumbbells towards your forehead
- Extend elbows to press the dumbbells back up, focusing on contracting the triceps
- Engage your core to maintain stability, and avoid moving your upper arms or shoulders
Coaching cue: Keep your elbows steady and pointing toward the ceiling throughout the movement to maintain triceps isolation and elbow health.
Strengthen your core with our pick of the best dumbbell abs exercises
One of the main advantages of using dumbbells for abs workouts is their ability to engage a wider range of muscles beyond just the superficial rectus abdominis (the ‘six-pack’ muscles). Dumbbell exercises such as Russian twists, weighted sit-ups, and dumbbell side bends target not only the rectus abdominis but also the obliques, transverse abdominis, and deeper core stabilizing muscles. This comprehensive engagement leads to well-rounded core strength, stability, and definition.
Using dumbbells for abs exercises also adds resistance, intensifying the challenge and stimulating muscle growth. The added load from dumbbells forces the abdominal muscles to work harder, promoting muscle hypertrophy and strength development. This increased resistance not only enhances the effectiveness of the workout but also helps build endurance and functional core strength that can translate into improved performance in other exercises and daily activities.
Dumbbell exercises offer a dynamic and varied range of movements that target the core from different angles, too. They engage the core in a multidirectional manner, promoting better muscle balance and coordination. These functional movements mimic real-life activities that require core stability and strength, contributing to overall performance enhancement and injury prevention.
Finally, using dumbbells for abs exercises can help improve overall posture and spinal alignment. Strengthening the core muscles through targeted dumbbell exercises can alleviate strain on the lower back, improve posture, and enhance spinal support. By developing a strong core foundation, you can reduce the risk of back injuries, enhance athletic performance, and even achieve a more toned and sculpted midsection.
- Dumbbell renegade row
- Dumbbell push-up to renegade row
- Dumbbell halo
- Dumbbell Russian twist
- Dumbbell crunch
- Dumbbell side bend
- Dumbbell crunch reach
1. Dumbbell renegade row
Why we like it: This move works your back muscles while challenging your stabilisers to keep you level. Think of it as a brutal version of the plank. It’s even tougher on rounded dumbbells, as they’re less stable.
How to do the dumbbell renegade row:
- Start in a press-up position, but with feet set slightly wider for balance, holding the handles of a pair of dumbbells
- Row one dumbbell up to your hip, put it down, then row the other
- Try to stay parallel to the floor – don’t twist
Form tip: As you row one dumbbell towards your rib cage, focus on keeping your elbow close to your body and squeezing your shoulder blade back. Slowly lower the dumbbell back to the starting position without letting your hips rise or sag. Alternate rows between each arm while maintaining a strong plank position.
2. Dumbbell push-up to renegade row
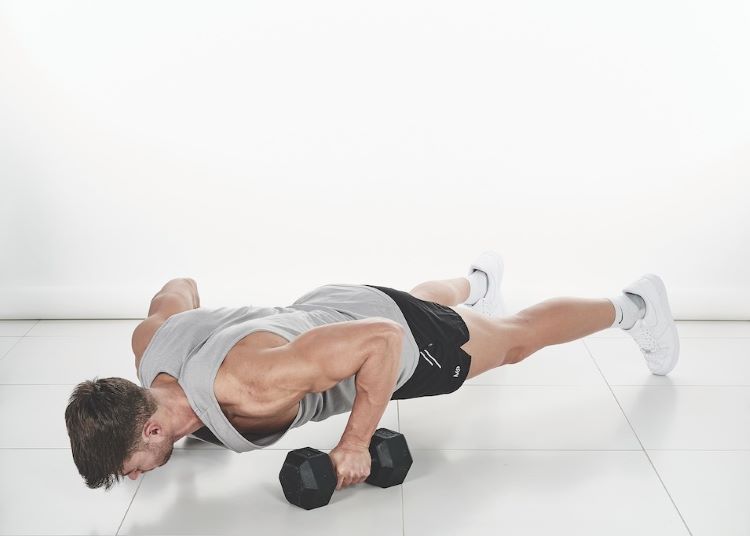
Why we like it: Adding a push-up to the move engages your chest – especially if you use the extra height to descend further into the move. It’s pulling and pushing in one move, making this great bang for your buck.
How to do the dumbbell push-up to renegade row:
- Start in a push-up position, holding the handles of a pair of dumbbells
- Do a push-up
- At the top of the move, row one dumbbell upwards and then the other, so that your thumb touches your armpit
- Try to stay parallel to the floor – don’t twist
Common mistakes to avoid with the dumbbell push-up to renegade row:
- Allowing the hips to twist: Rotating or twisting the hips excessively while performing the rows can compromise core stability and lead to an uneven distribution of weight. Focus on keeping your hips square to the ground and engaging your core muscles to prevent any rotational movements
- Using momentum: Swinging the dumbbells or relying on momentum to complete the rows can take away from the targeted muscle engagement. Ensure that you perform each row with controlled, deliberate movements to fully engage the back muscles and maintain proper form
- Incorrect hand positioning: Placing the hands too far apart or too close together can affect the stability and effectiveness of the exercise. Make sure your hands are directly under your shoulders during the push-up position and maintain a stable hand position while rowing the dumbbells
3. Dumbbell halo
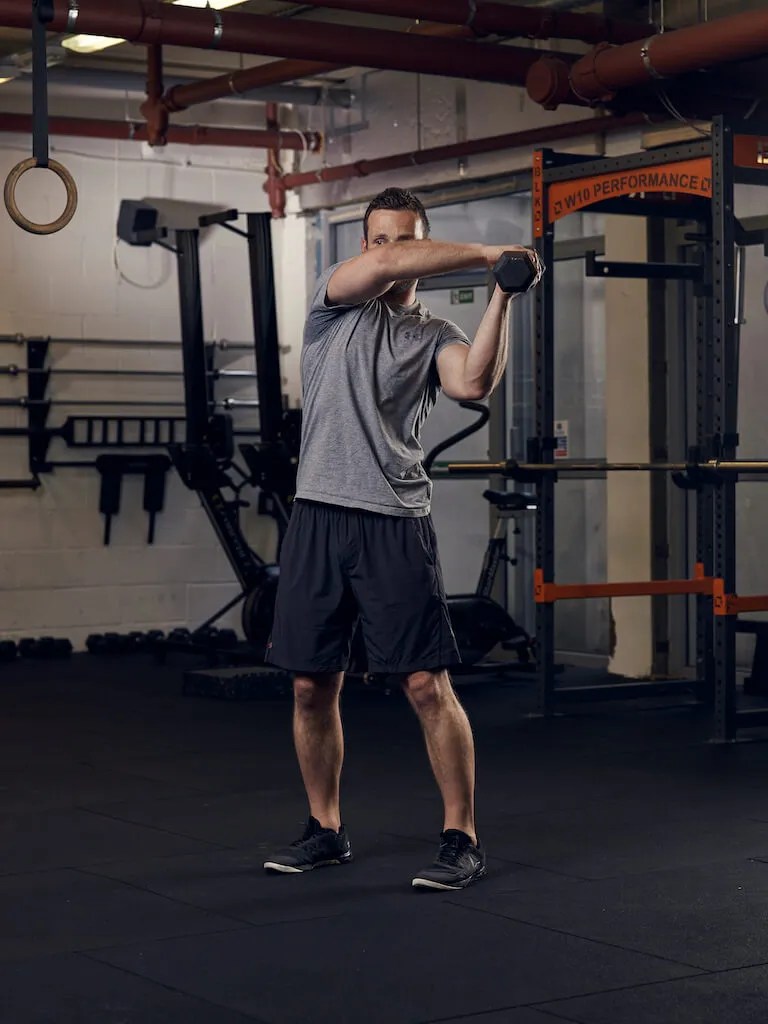
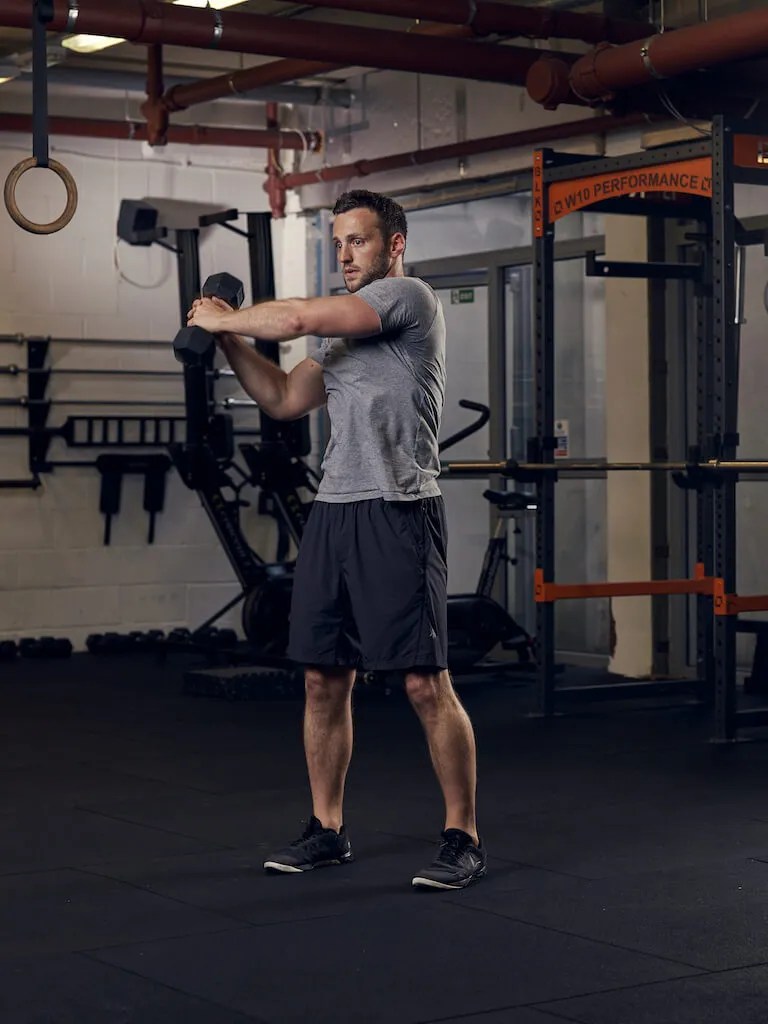
Why we like it: This move engages all the muscles of your core and, because you’re doing it from a standing position, teaches them to fire in practical situations.
How to do the dumbbell halo:
- Holding a dumbbell in both hands, move it around your head in smooth circles, engaging your core as you circle it around
- After one complete circle, reverse directions
Form tip for the dumbbell halo: Aim for a fluid motion as you rotate the dumbbell around your head. Avoid jerky or rushed movements that could compromise form and increase the risk of shoulder strain.
4. Dumbbell Russian twist

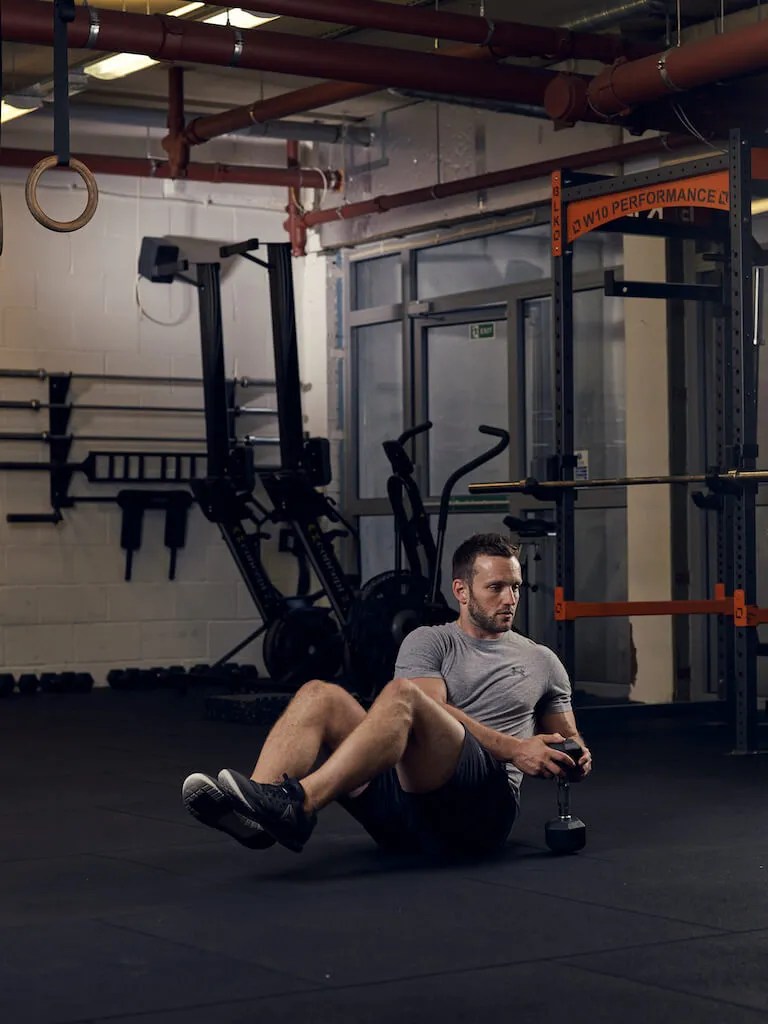
Why we like it: Training rotation is vital for sports performance and a well-rounded physique, and this is one of the safest ways to do it effectively.
How to do the dumbbell Russian twist:
- Sit on the floor with your knees bent and feet slightly raised, holding a dumbbell in front of you
- Twist to one side, pause, and then twist to the other
- That’s 1 rep
Common mistakes to avoid with the dumbbell Russian twist:
- Twisting too far: Twisting excessively from side to side beyond a comfortable range of motion can strain the spine and lead to potential injuries. Focus on twisting from the torso while maintaining proper alignment and avoiding excessive rotation
- Using momentum: One common mistake is using momentum to twist from side to side rather than engaging the core muscles. Avoid swinging the dumbbell quickly back and forth, as this can reduce the effectiveness of the exercise. Focus on controlled and deliberate movements
5. Dumbbell crunch
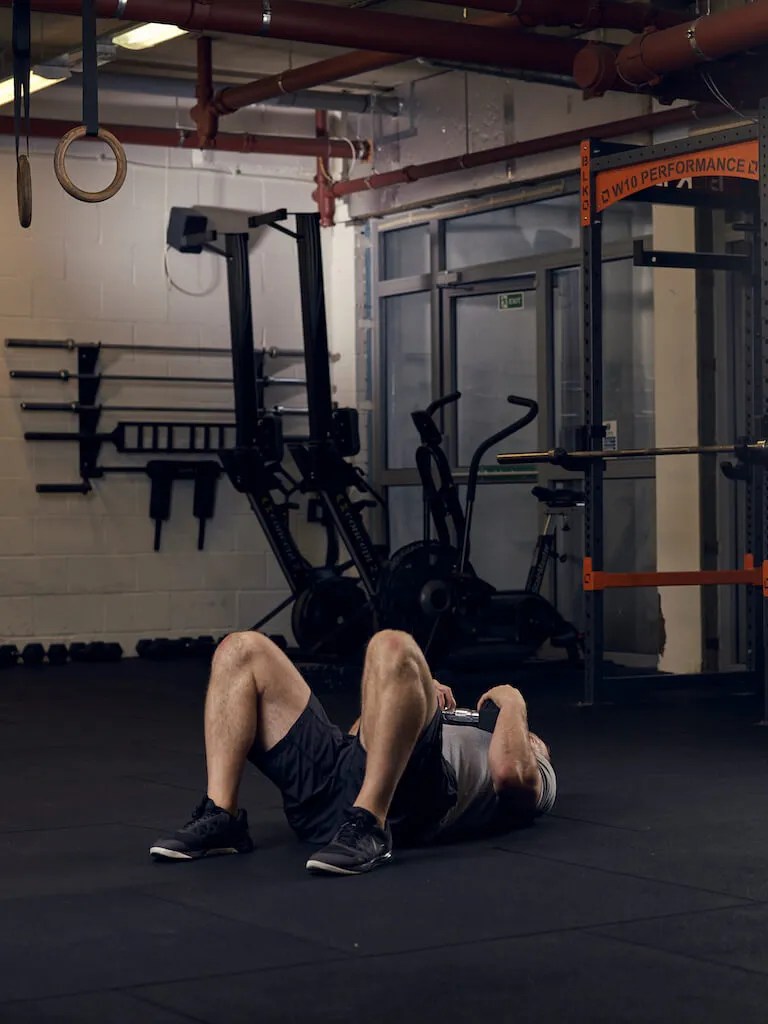
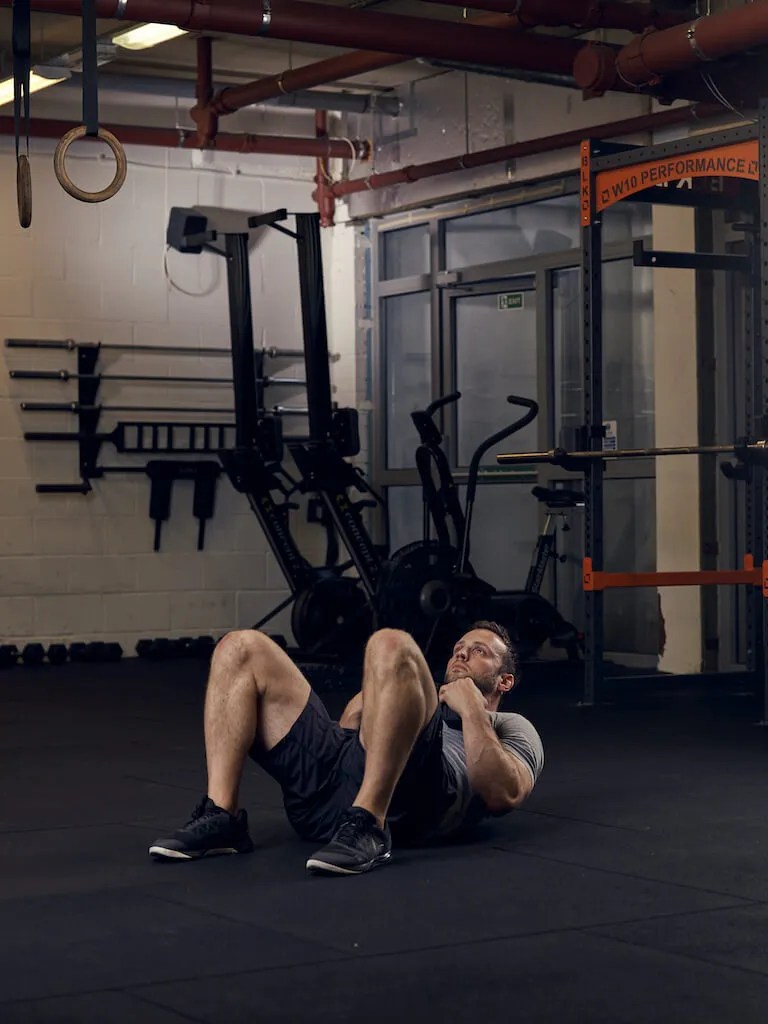
Why we like it: In lab testing, weighted crunches activate the abs more than almost any other isolation move. Using a dumbbell (or weight plate) for slow, controlled reps is a great way to work your entire core.
How to do the dumbbell crunch:
- Lie flat on your back with knees bent and a dumbbell held at chest level
- Contract your abs to lift your shoulders off the floor and curl your chest towards your knees
- Pause at the top of the move and squeeze your abs, then lower slowly to the start
Coaching cue for the dumbbell crunch: Before initiating the crunch, engage your abdominal muscles by drawing your belly button in towards your spine. This helps stabilize your torso and protect your lower back during the movement.
6. Dumbbell side bend
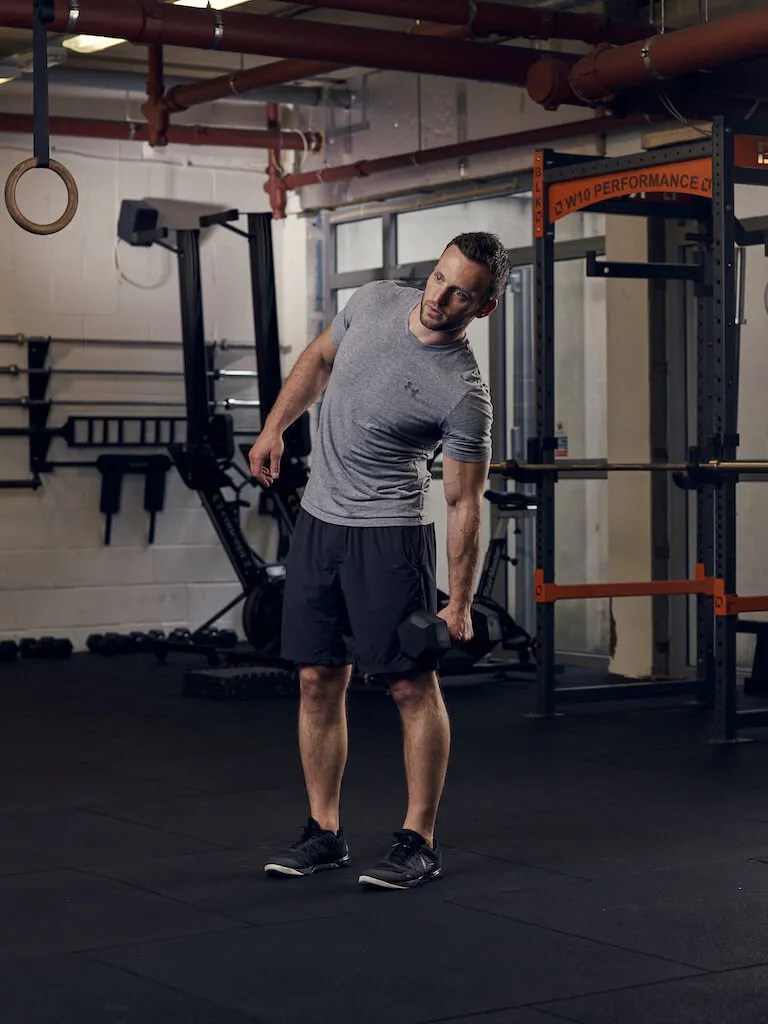
Why we like it: As well as your obliques, the side bend works the muscles of your lower back, safeguarding your core.
How to do the dumbbell side bend:
- Hold a heavy dumbbell in one hand and bend your torso towards your weighted hand
- Pause when you feel a stretch up your opposite side, then straighten up without leaning forwards or back
Coaching cue: Focus on using your side muscles to lift back up, rather than harnessing momentum or swinging.
7. Dumbbell crunch reach
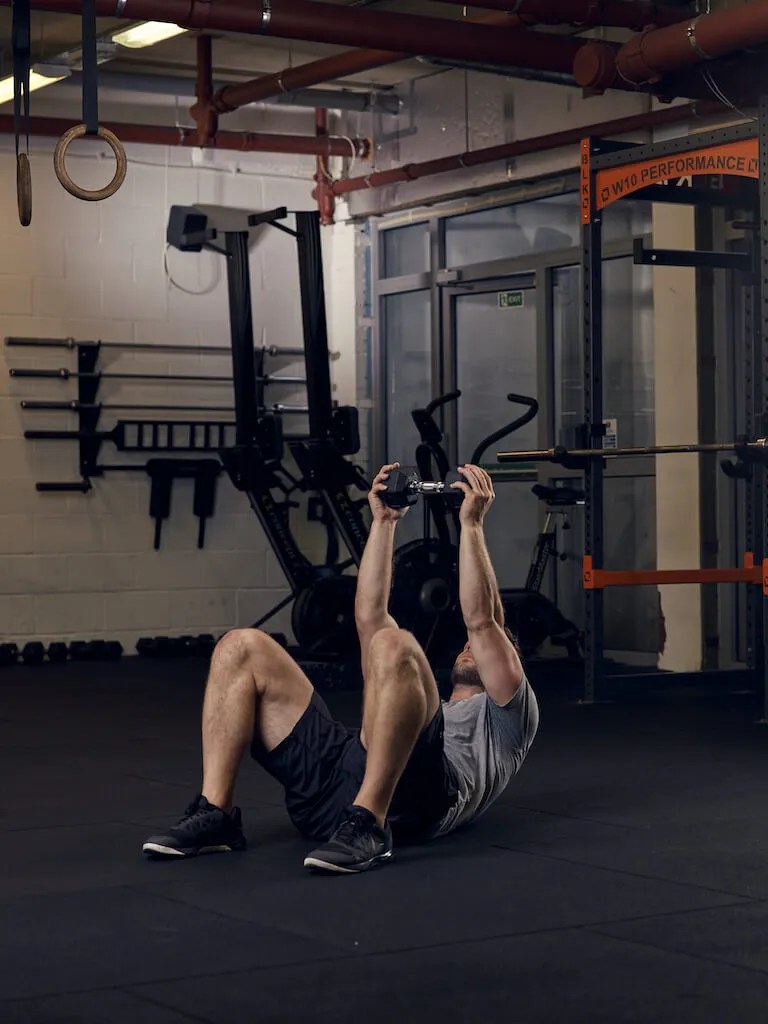
Why we like it: Leading with the dumbbell discourages you from jerking, ensuring that the focus stays on your abs.
How to do the dumbbell crunch reach:
- Start by lying on your back on a mat with your knees bent and feet flat on the floor
- Hold a dumbbell in each hand, extending your arms straight up towards the ceiling
- Before starting the movement, engage your core muscles by drawing your navel towards your spine
- As you exhale, lift your head, shoulders, and upper back off the floor
- At the top of the movement, focus on squeezing your abdominal muscles to maximize the contraction. Hold this position briefly to feel the engagement in your core
- Slowly lower your head, shoulders, and upper back back to the starting position while inhaling. Your arms with the dumbbells should lower back towards the floor as well
Form tip: Keep your arms – and the dumbbell – as fixed in place as you can throughout the movement. The weight is there for resistance, not to provide leverage.